Thrive Apprentice is an excellent course building tool, but the sheer number of features and options can be overwhelming for new users. In this step-by-step guide, I’ll show you how to get to grips with it and build your first online course.
I’ll cover the following:
- How to set up Thrive Apprentice on your WordPress site.
- How to build a course with Thrive Apprentice.
- How to use the Thrive Quiz Builder in conjunction with Thrive Apprentice.
When you’ve finished reading, you’ll have all of the information you’ll need to create your course.
Table of Contents
How to Set Up Thrive Apprentice on Your WordPress Site

Before you can start working on your course, you’ll need to install the Thrive Apprentice plugin on your site. This means you’ll need to purchase a Thrive Suite plan and install the Thrive Product Manager.
Next, head to the Product Manager in your WordPress dashboard. This will take you to an area where you can activate the Thrive products you want to use and manage the ones you’re already using.
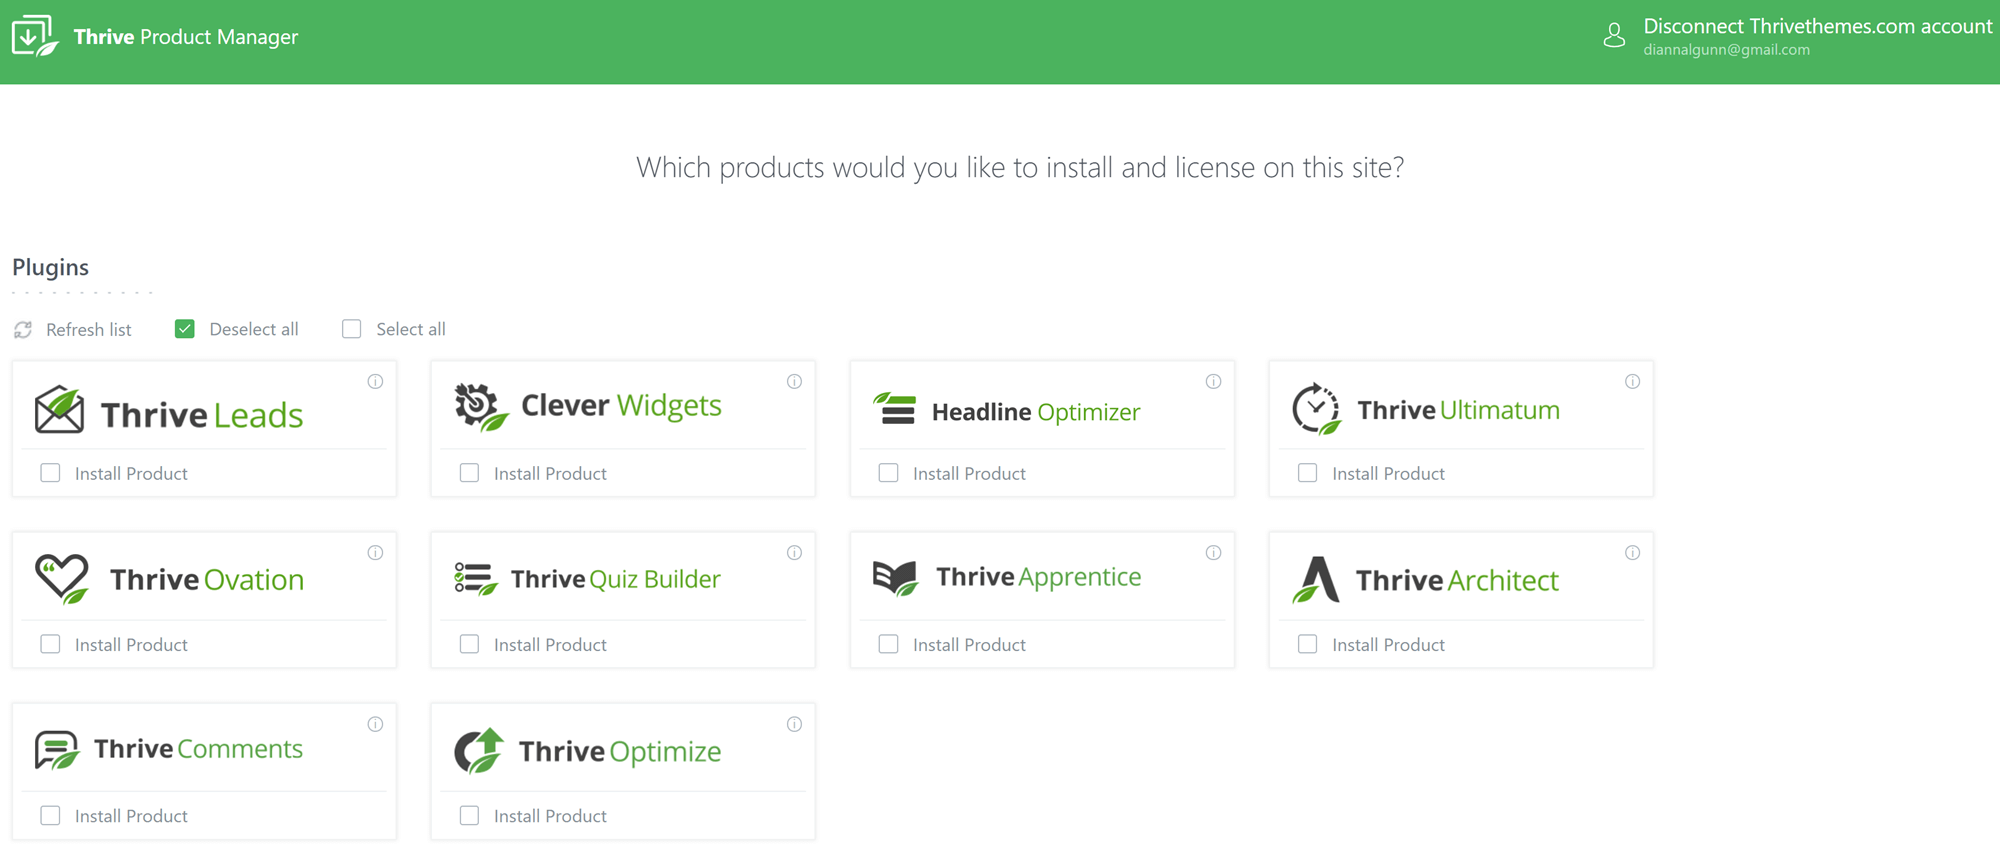
Check off the ‘Install Product’ box below Thrive, then click the ‘Install Product’ button that appears at the bottom of the screen. If you want to add quizzes to your courses, you’ll also need to install the Thrive Quiz Builder.
How to Build a Course with Thrive Apprentice
Basic Course Setup
To start building your first course, head to your Thrive dashboard and click ‘Apprentice Dashboard’.
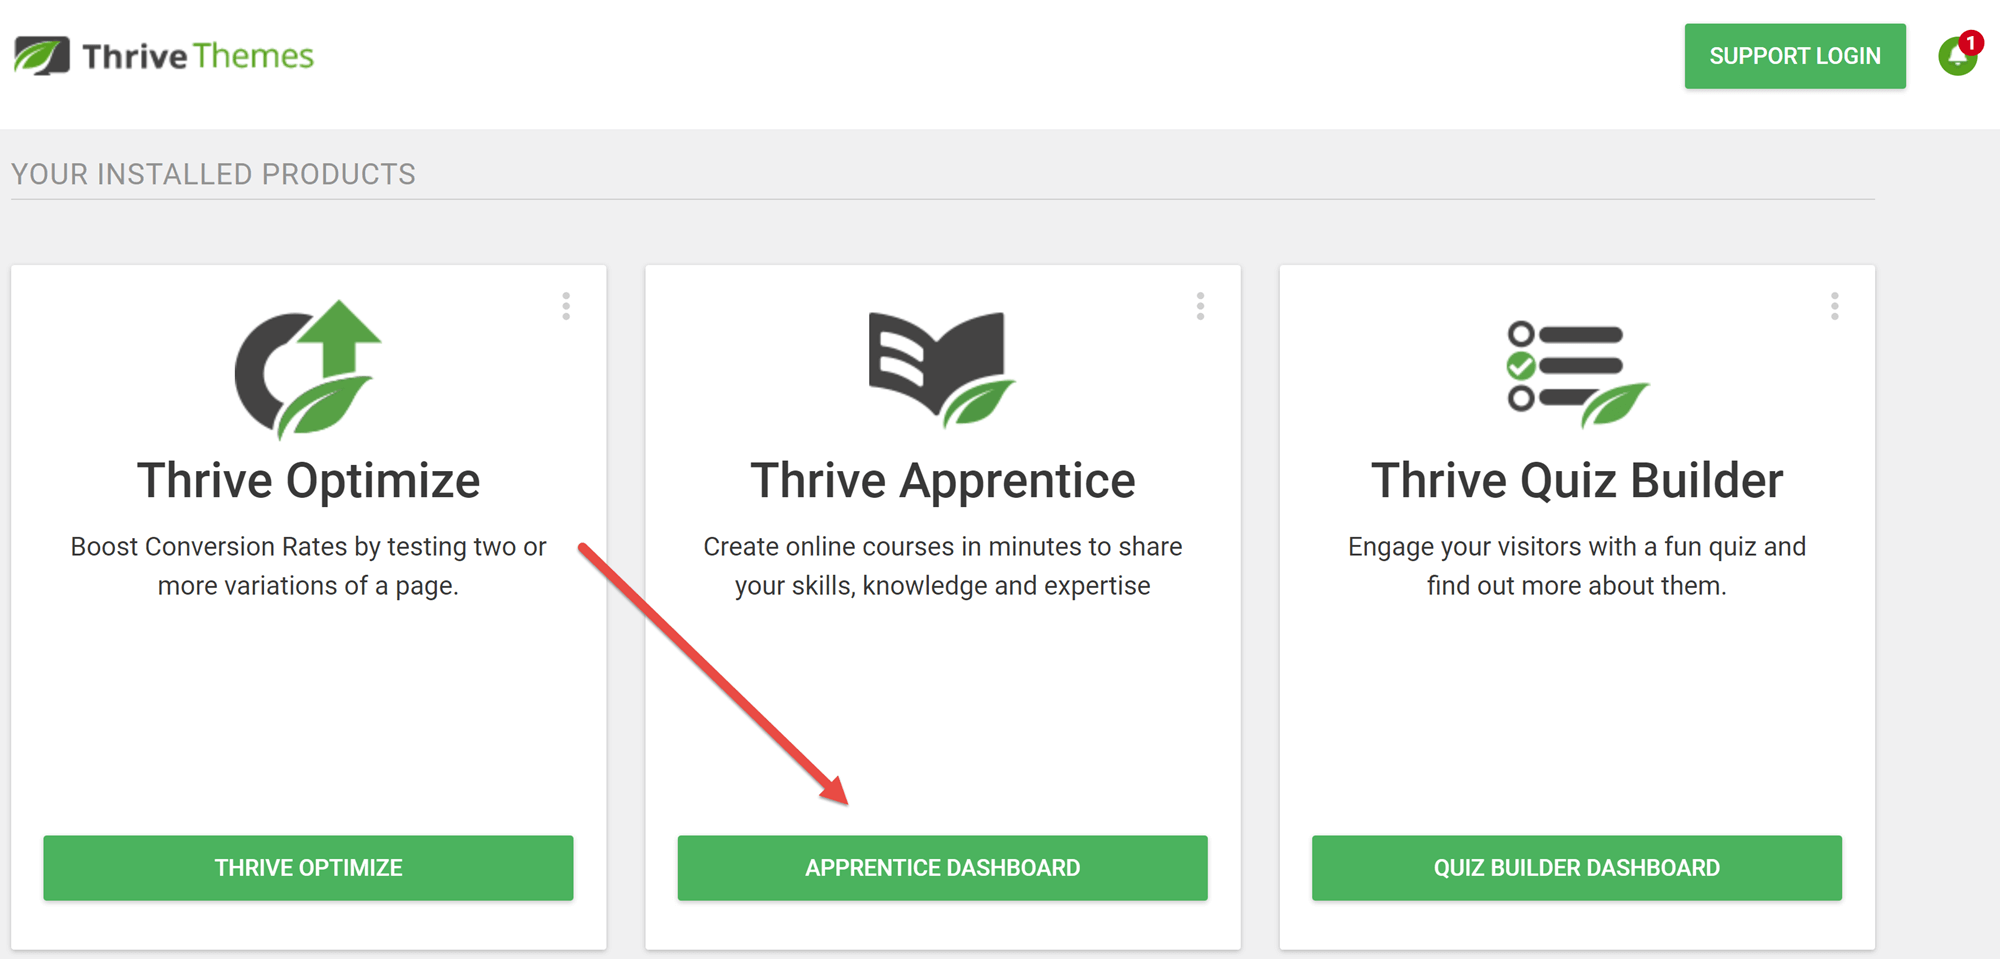
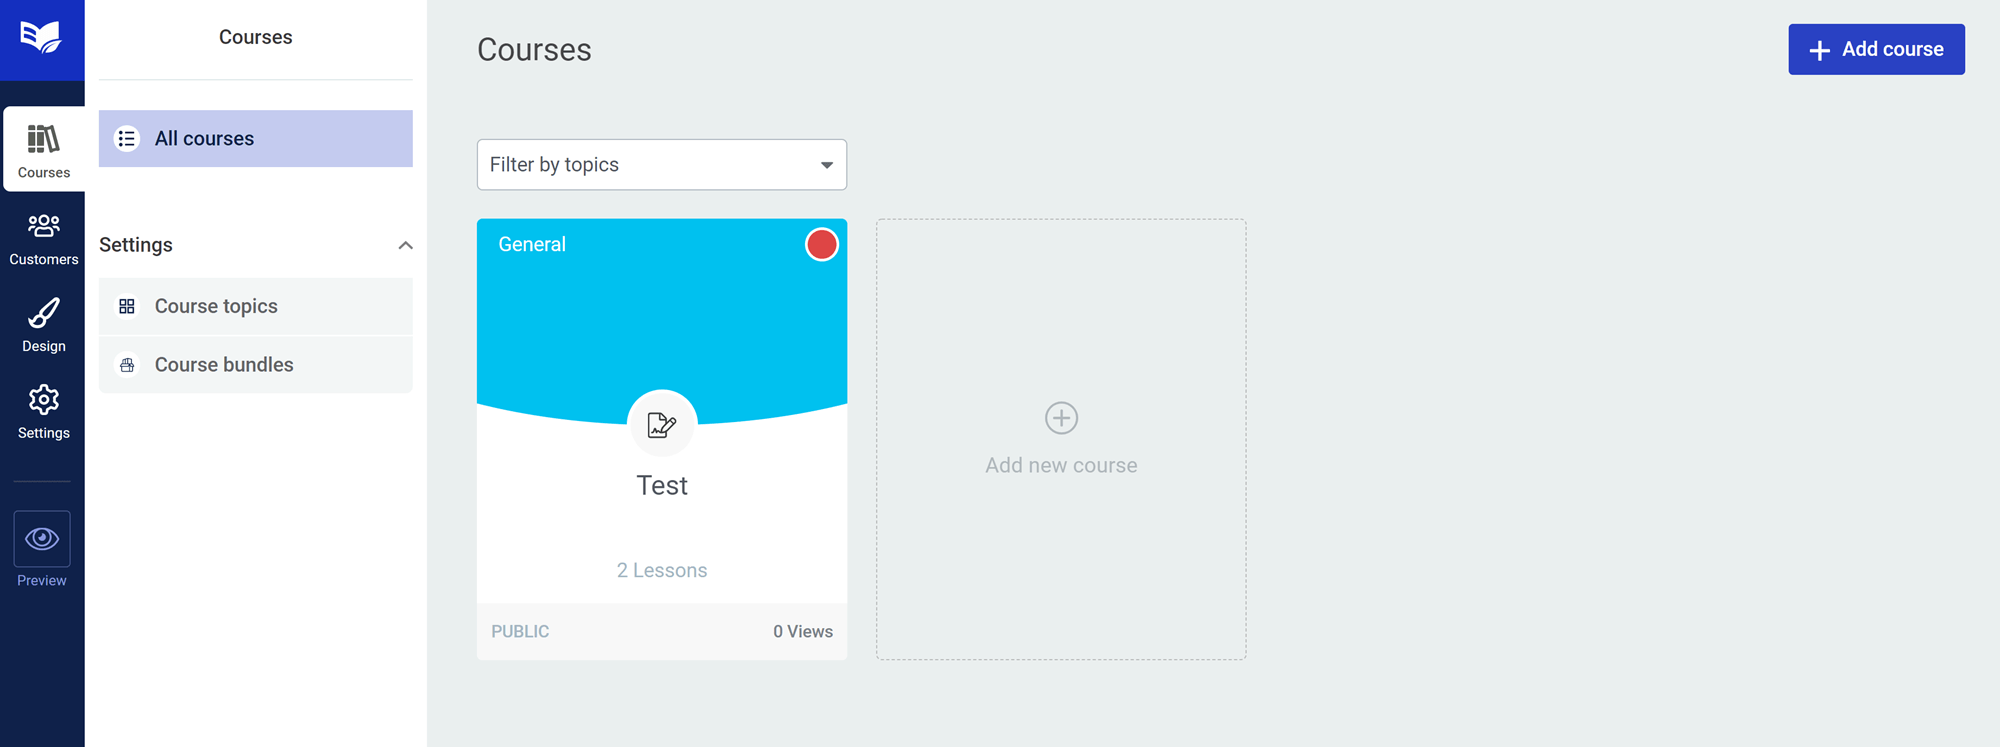
This will open a page where you can view your courses and access key areas of Thrive Apprentice. Click ‘Add New Course’.
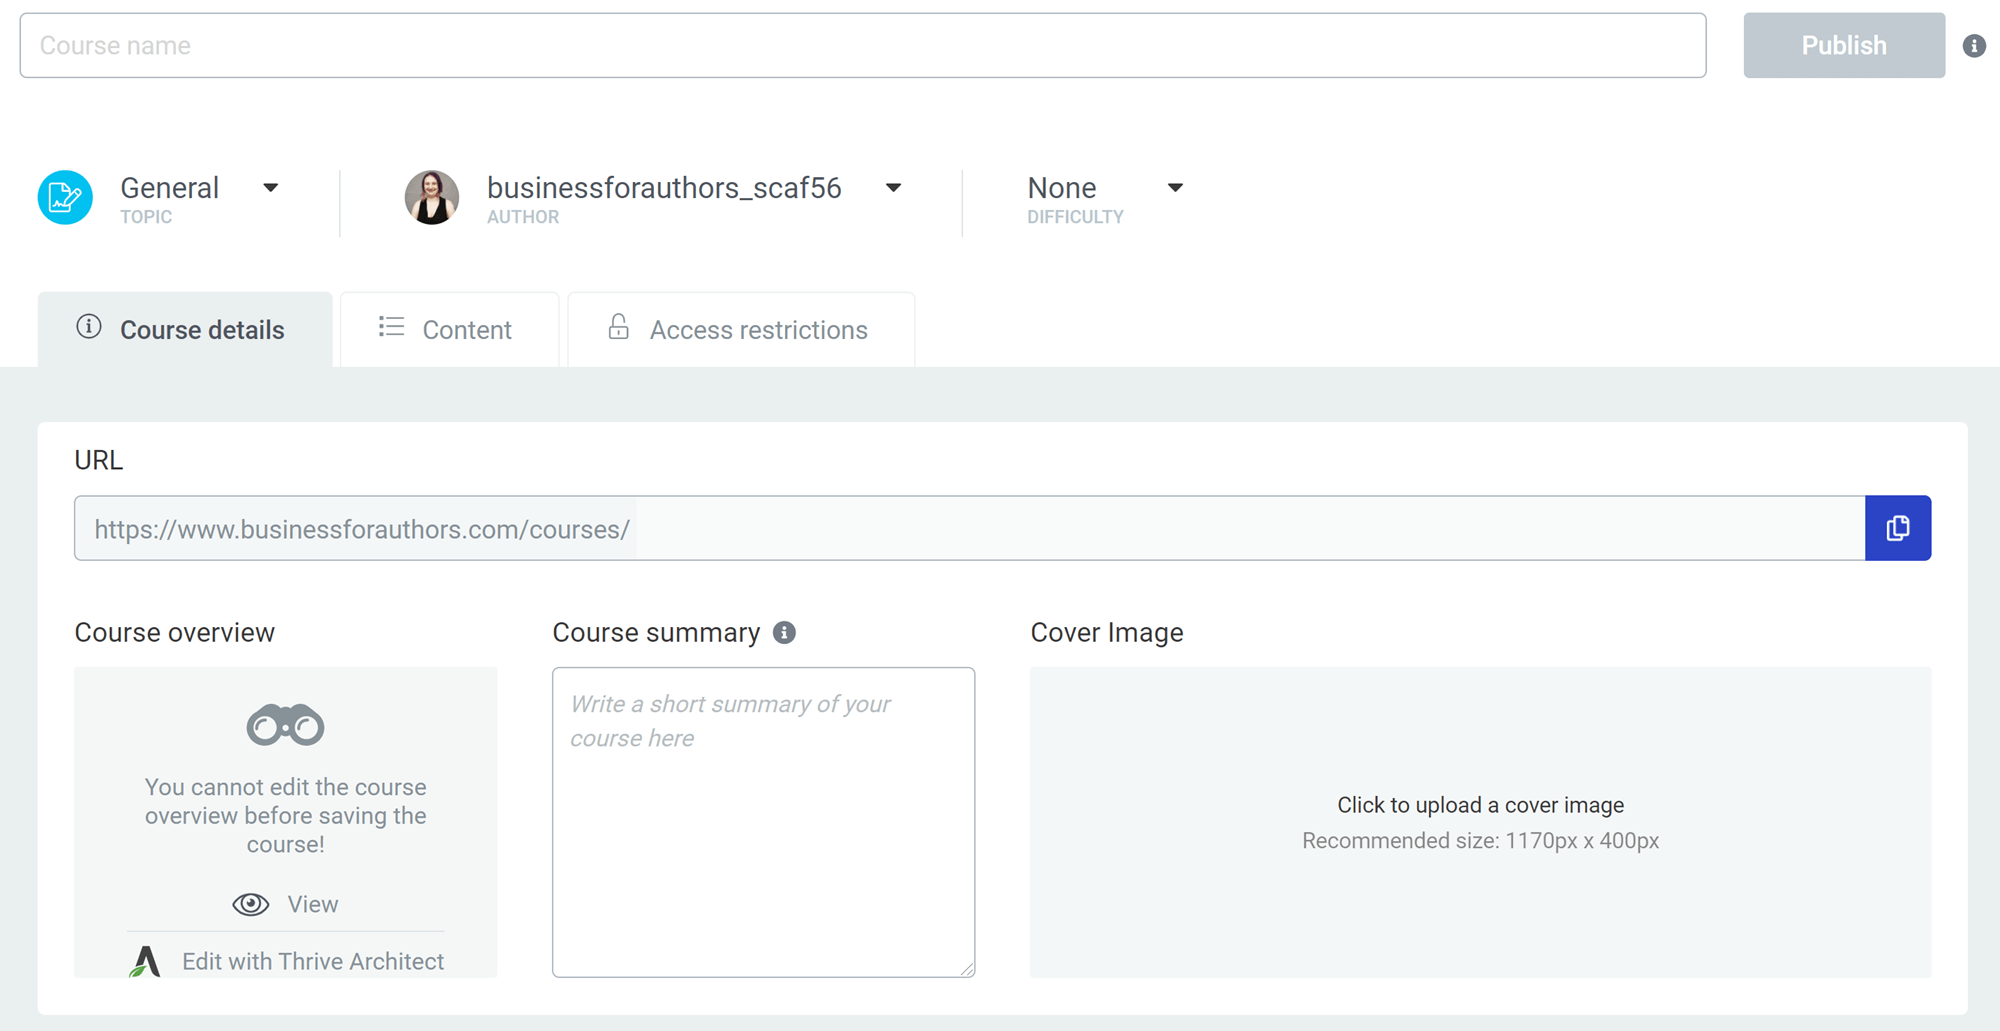
This opens the course builder. In the first area, you can add the title in a box across the top and customize some key aspects of your course:
- Topic: These are categories you can use to organize your various courses. By default, the only topic is ‘General’. If you click on the dropdown menu, you’ll be given an option to add a topic. There’s no limit to the number of topics you can have on your site.
- Author: In most cases, you’ll be the author, but you can also give credit to other users registered on the WordPress side of your site.
- Difficulty level: By default, Thrive Apprentice includes Easy, Intermediate and Advanced levels. You can also add your own difficulty levels.
- Course overview: A detailed overview of what students can expect to find in your course. This will be opened as a separate page, and will automatically open in Thrive Architect, even if you’ve only installed the Apprentice plugin. Note that if you haven’t installed Architect, you’ll only be able to access some of the page builder’s features.
- Course summary: A shortened description of the course. There’s no character limit in this spot, but I recommend sticking with one paragraph.
- Cover image: You can add a banner here. Recommended dimensions are 1170 x 400 pixels.
- Author settings: You can customize the image and bio displayed here. By default, Apprentice will use the information from your WordPress profile.
- Comments: You can toggle comments on or off for each course.
- Video description: This allows you to add a video description or promotion for your course. The video will be placed directly under your course title.
I loved the number of things you can customize right on this first page, especially the variety of promotional materials you can create.
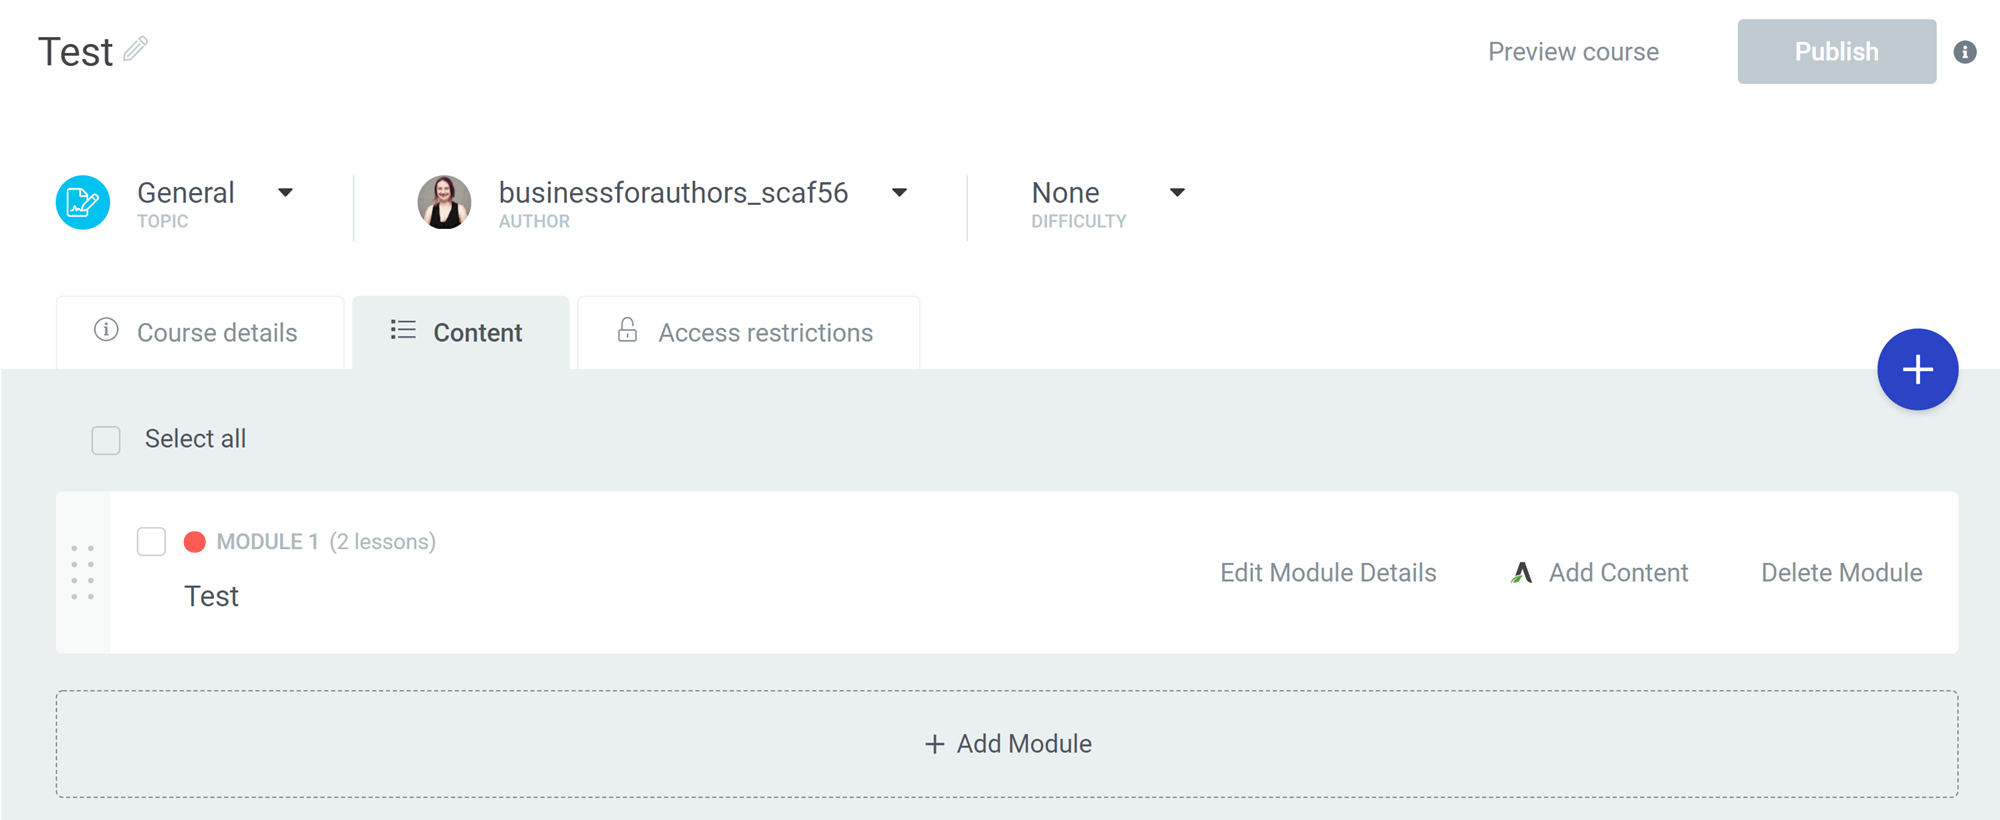
Content Area
The ‘Content’ area is where you’ll be able to view, organize and add to your course outline. Note that Thrive Apprentice lets you group lessons into modules for optimum course organization.
Access Restrictions
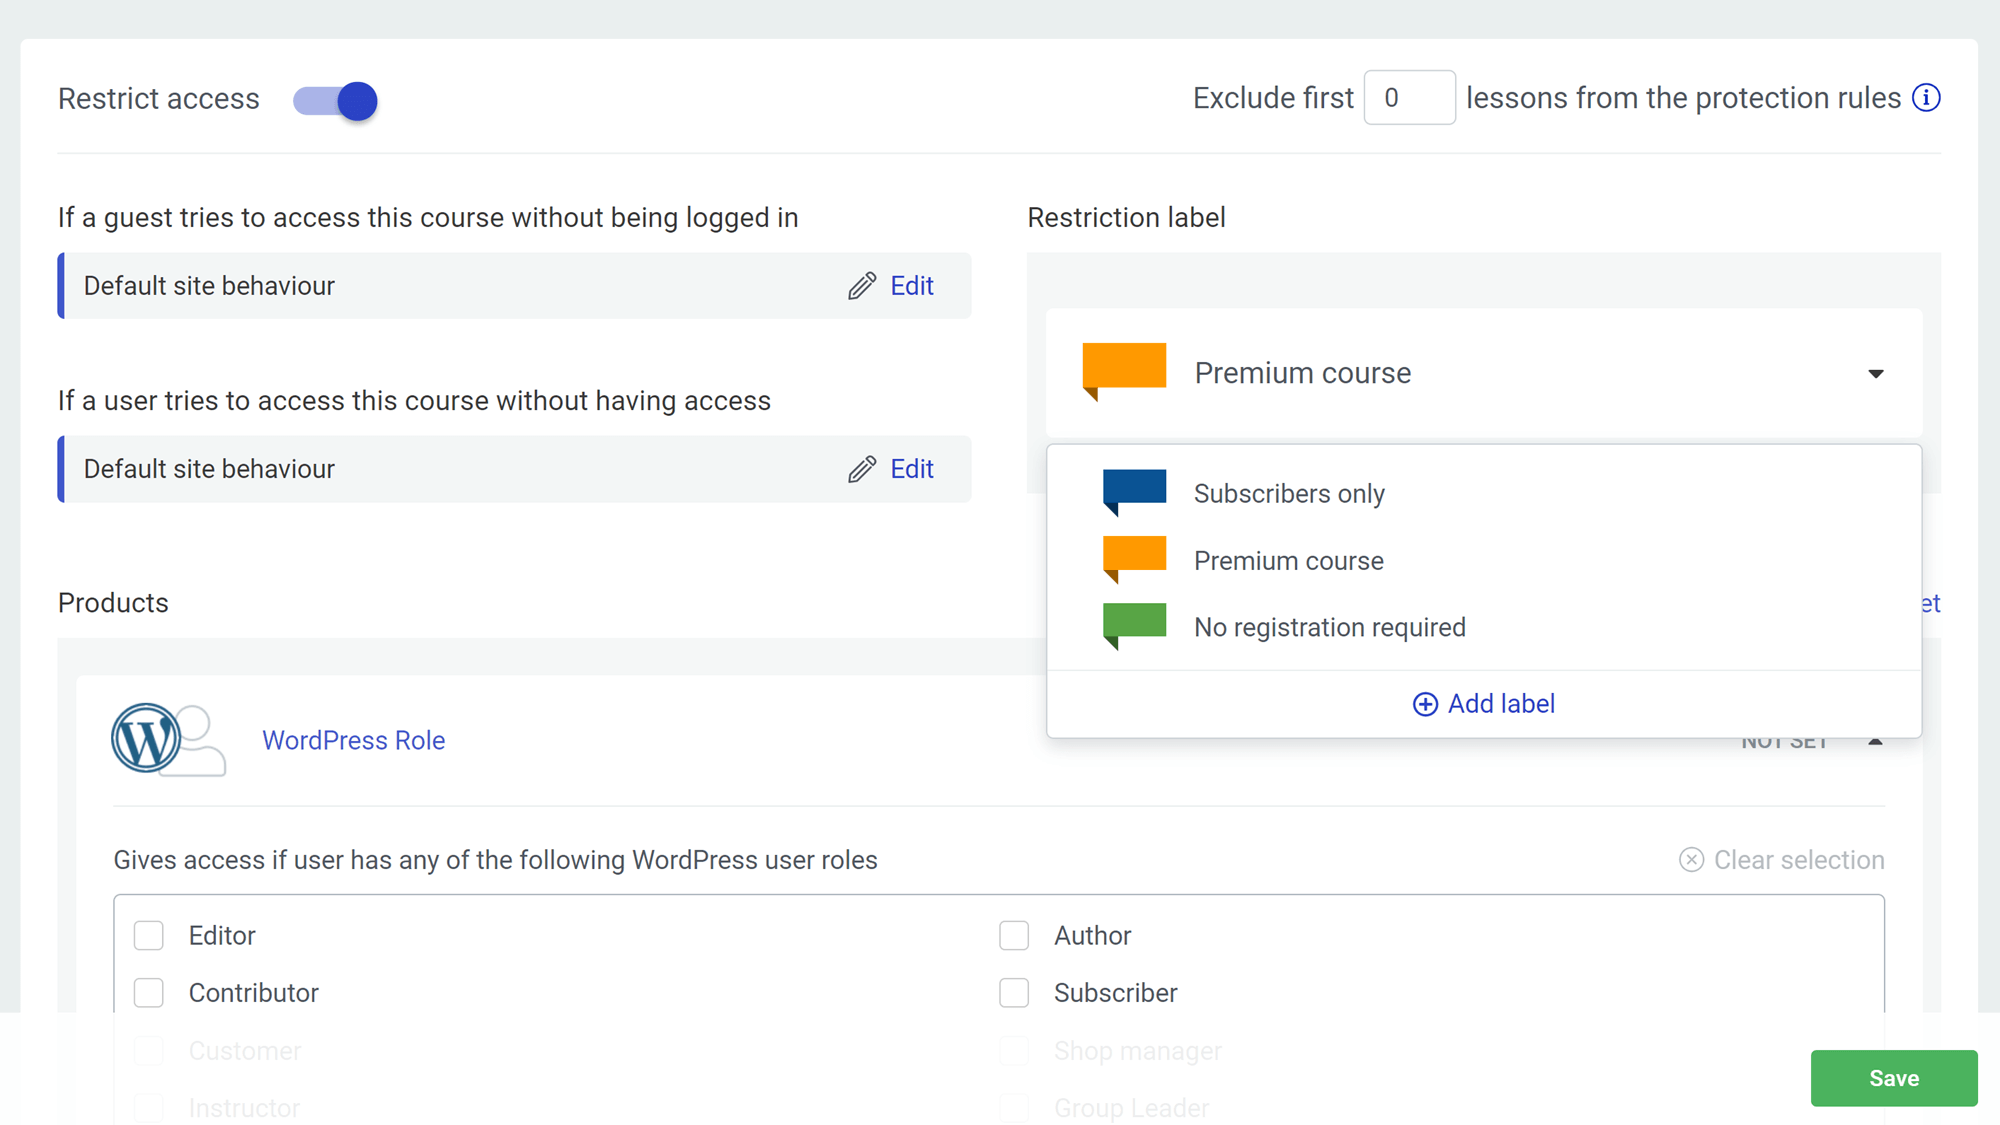
The final area of the course builder is ‘Access Restrictions’, which is where you can determine who has access to the course. Thrive Apprentice lets you restrict access based on two types of criteria:
- The WordPress role a user possesses. Some membership plugins’ membership levels will also appear in this area.
- Settings/information from an ecommerce tool, such as WooCommerce, or the proprietary Thrive tool, ThriveCart. Note that to fully configure a product, you’ll need to configure its settings using your payment processor or membership plugin.
Thrive Apprentice also uses a color-coded flag system to organize courses into ‘No Registration Required’, ‘Subscribers Only’, or ‘Premium Course’. This is a visual tool only; it doesn’t change the permissions.
Adding Lessons to Your Course
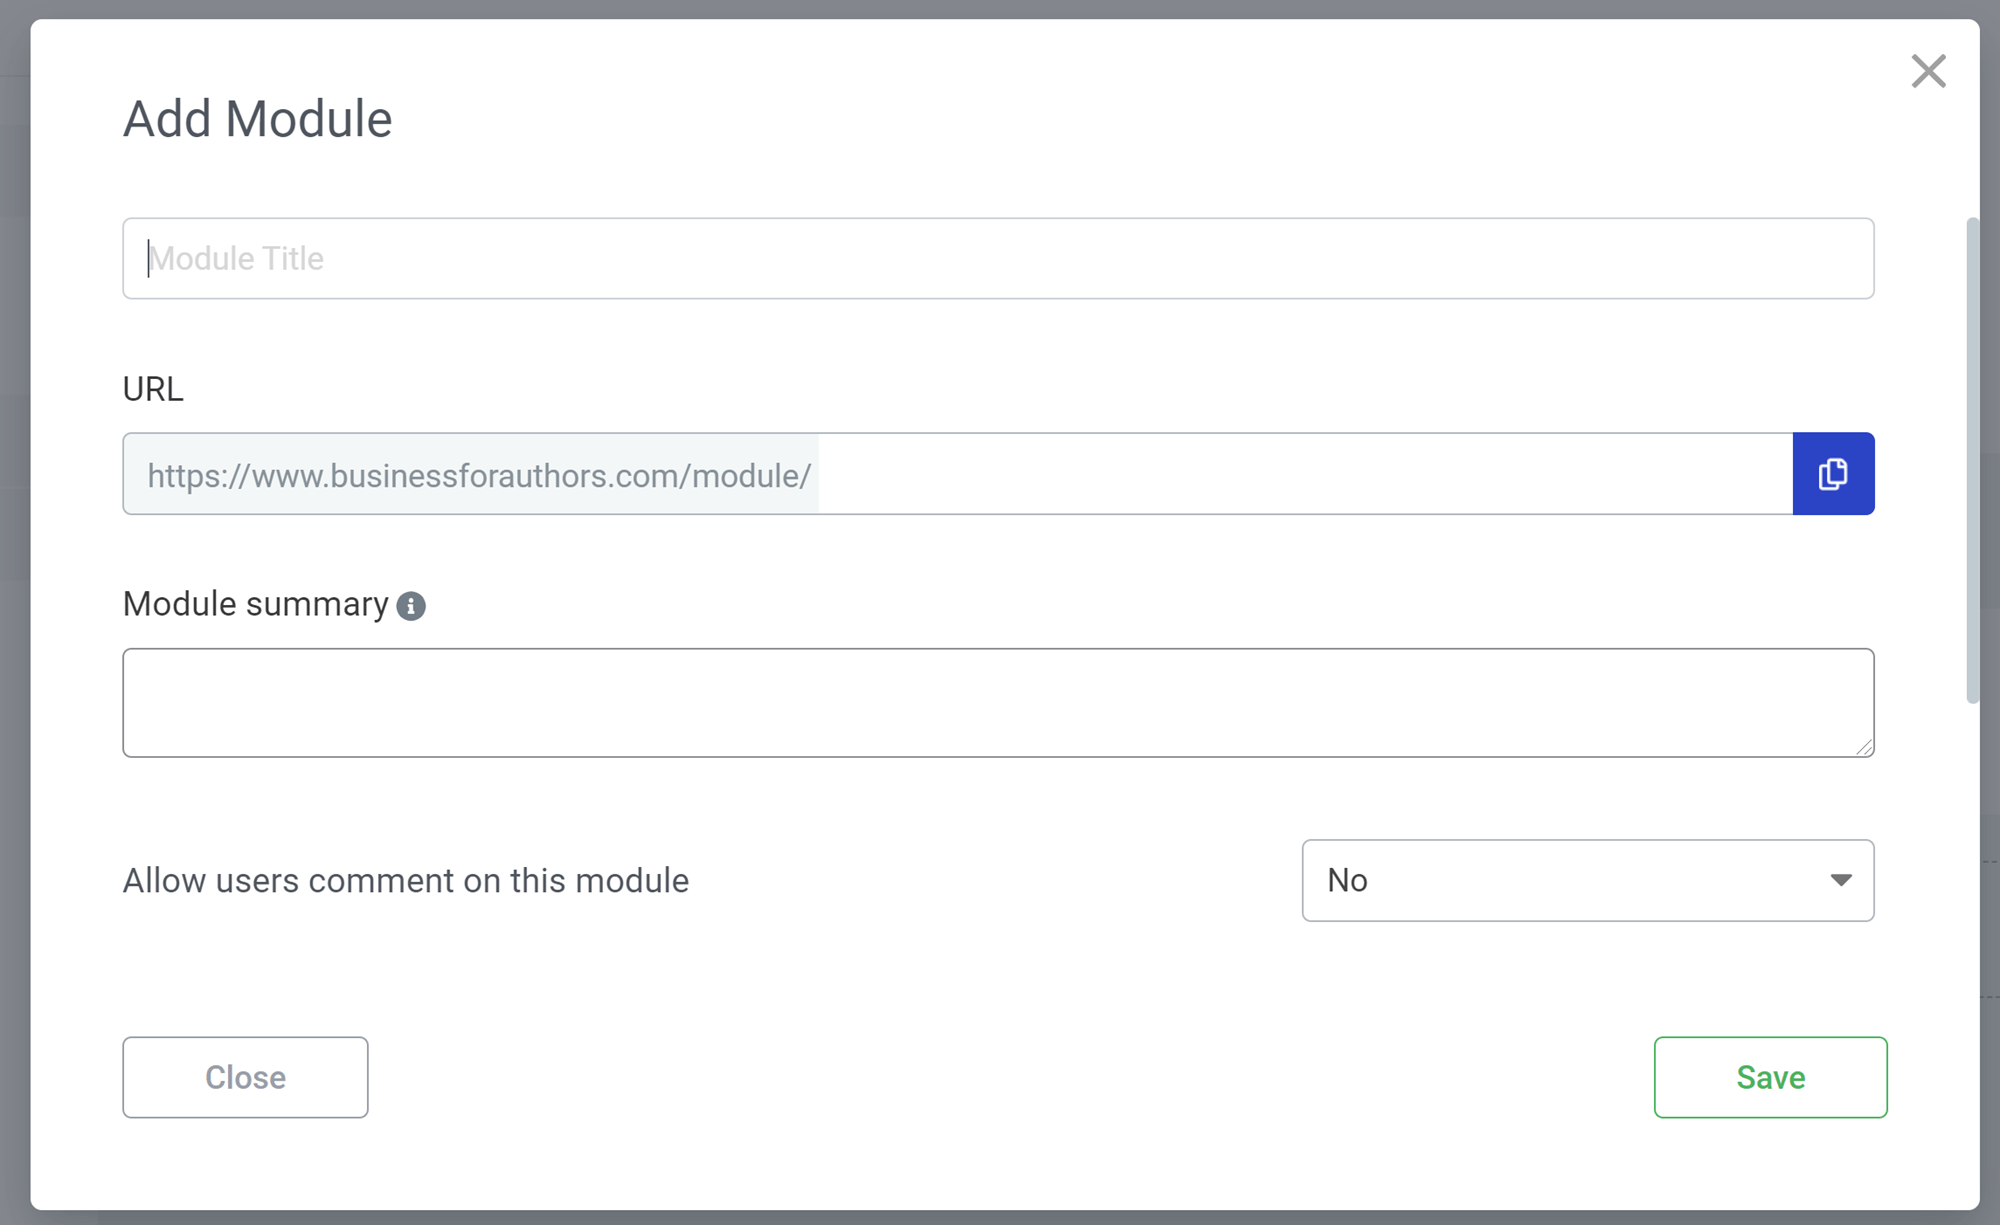
Once you’ve set up your access restrictions and course description, you’re ready to learn the details of how to build a course with Thrive Apprentice. To get started, head to the ‘Content’ area of the course builder and click ‘Add Module’, which will open a box that lets you configure the module’s title, URL and summary.
Next, hover over the listing of your new module and click the image of a pencil to reveal a list of lessons, as well as buttons for adding lessons and chapters.

Clicking ‘Add Lesson’ will allow you to create a title, URL and summary for the lesson. You can then hover your mouse over the listing for your lesson and click the ‘Edit’ link that appears.
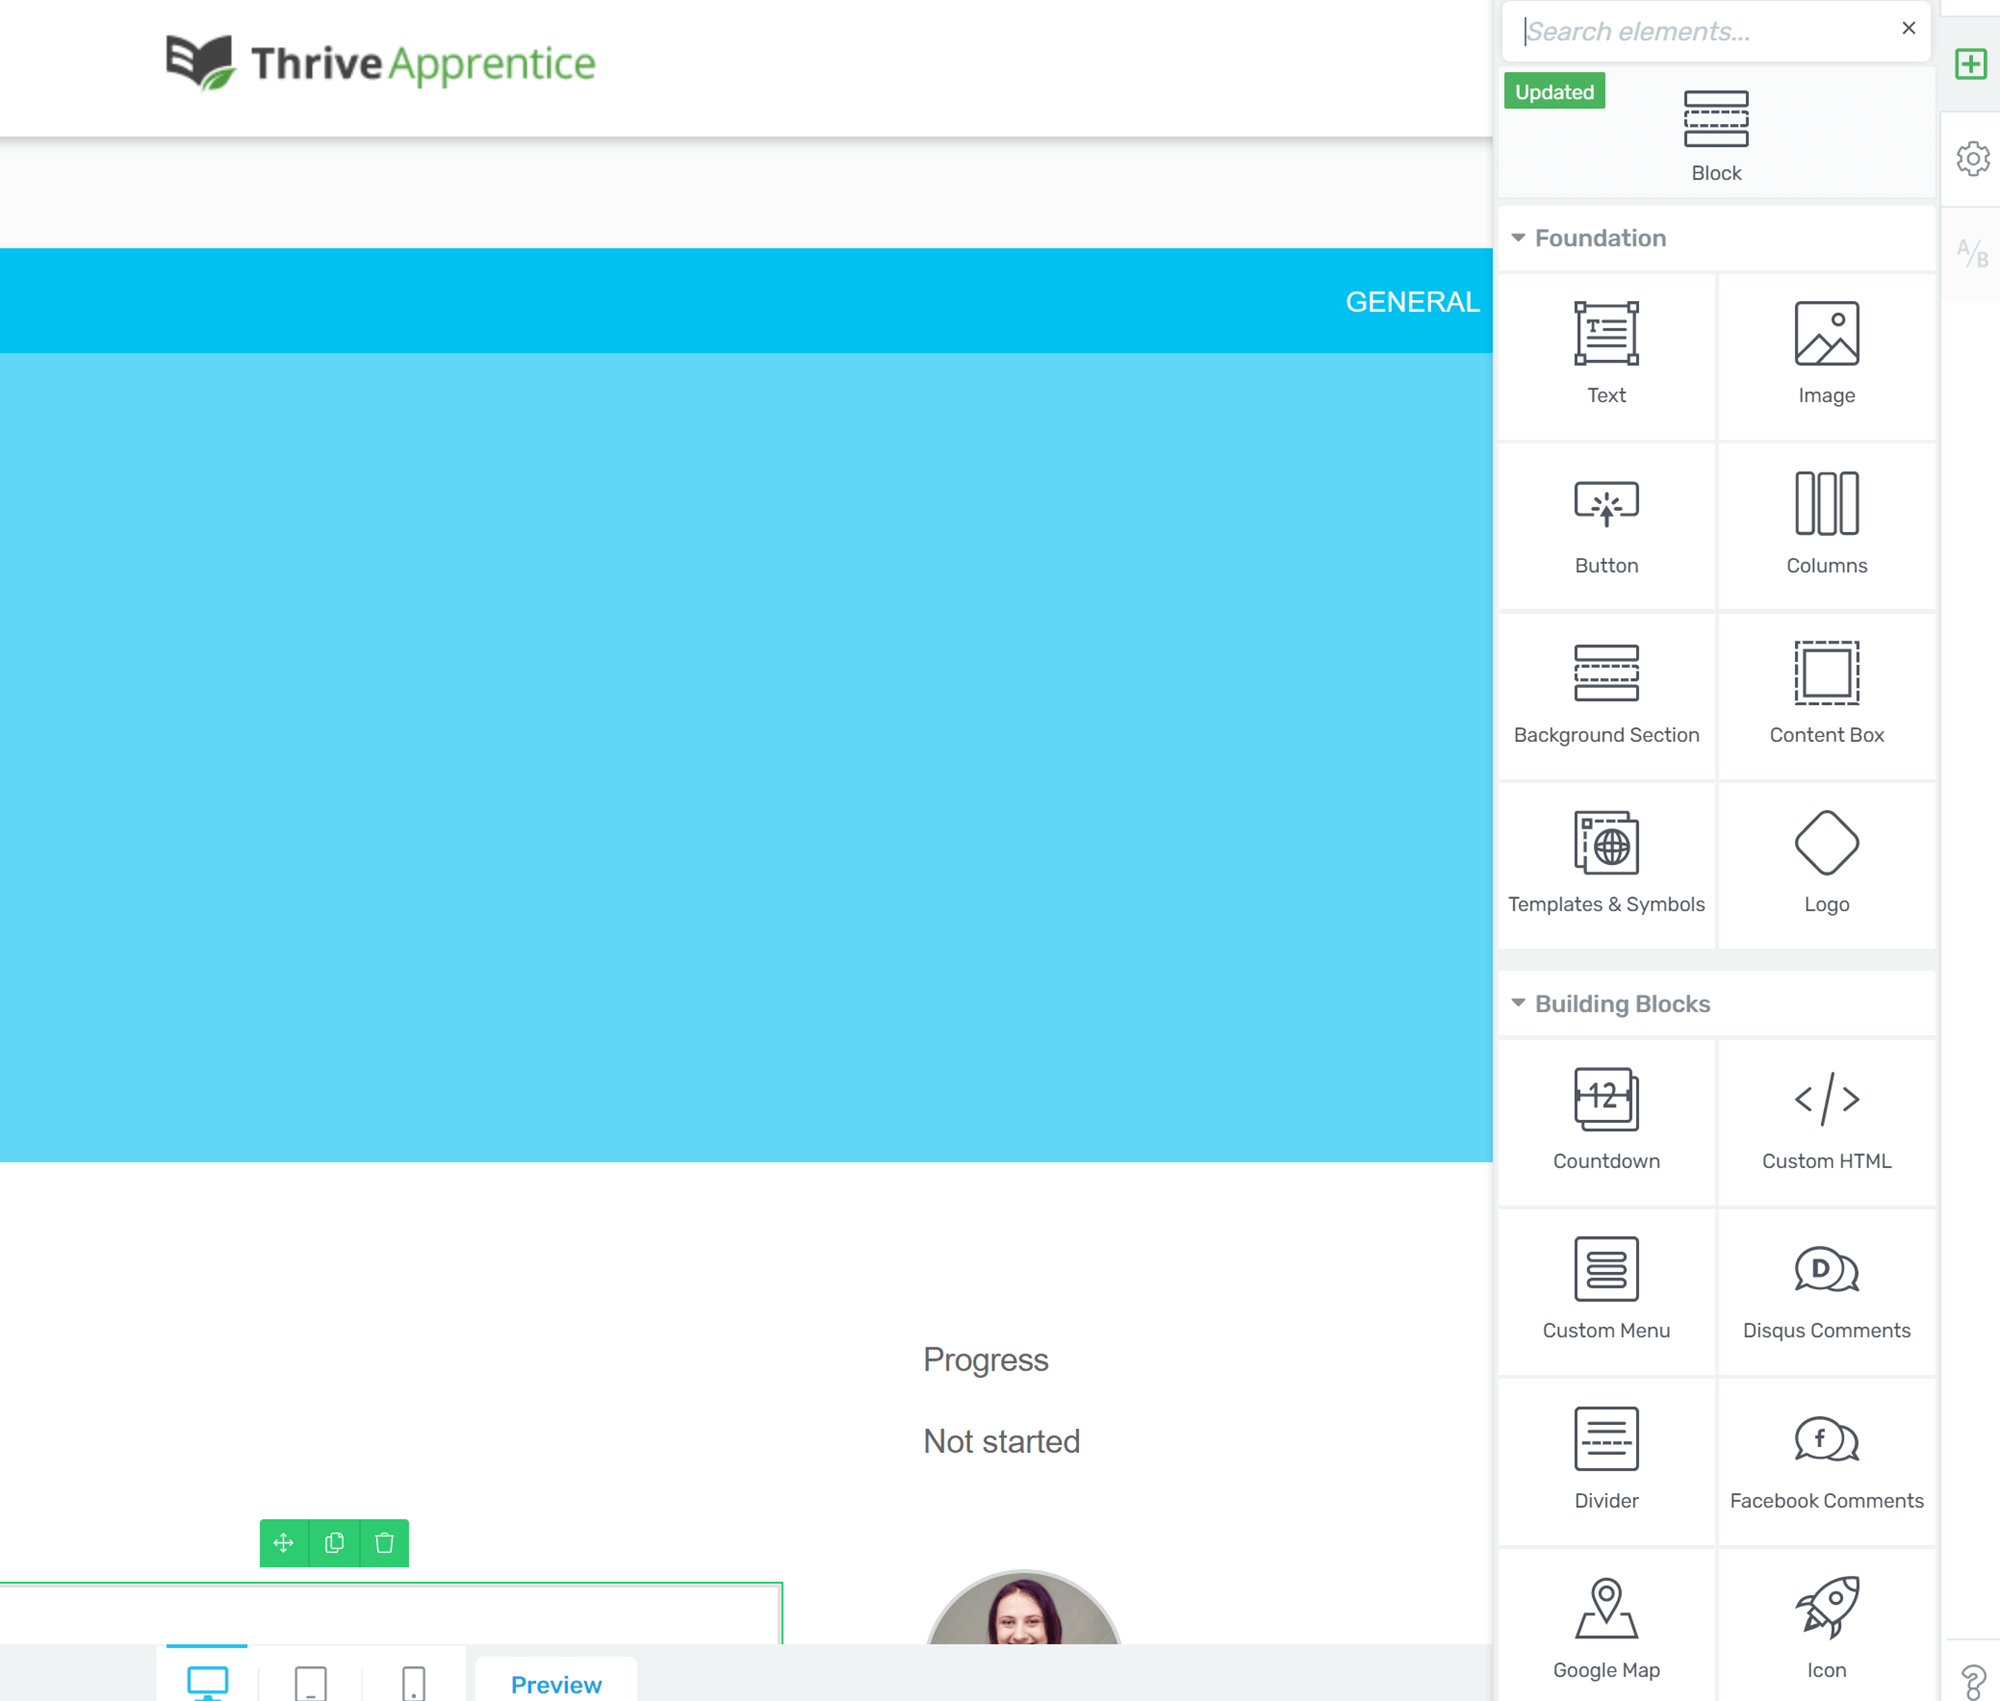
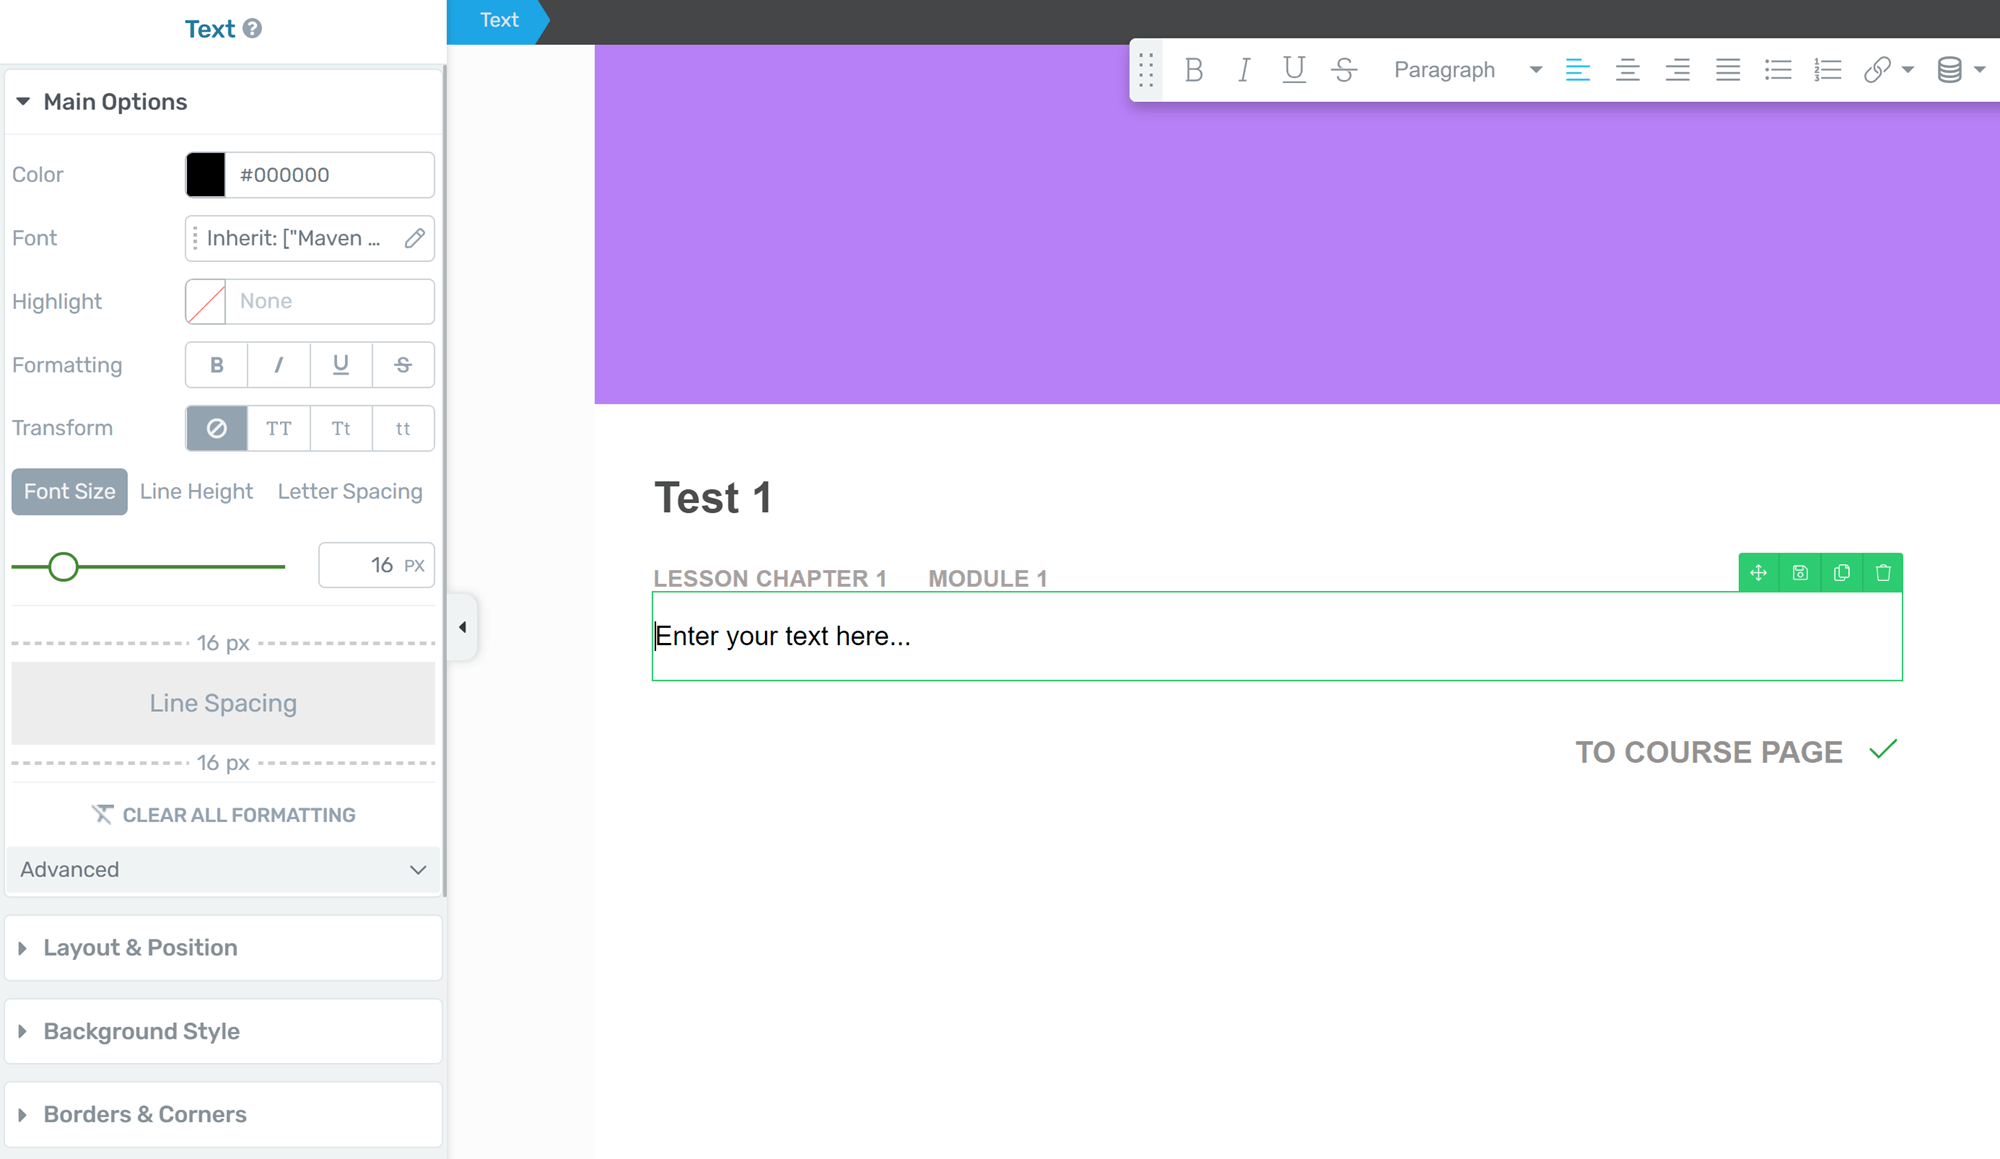
This opens your lesson in the Thrive Architect page builder. The page will already be formatted as a lesson, with a heading listing the number of the lesson and the author picture/bio of the course instructor.
Unfortunately, the default layout also includes this hideous blue bar:

I like the idea of listing the course topic at the top of the page, but this bar is way too large and doesn’t contain any information or compelling industry. All it does is distract from the actual content of the lesson.
There’s also no easy way to get rid of it or add images/more information to it. Even after searching through the help database, I only found information about changing the topic color and icon in the ‘Course Topics’ area of Thrive Apprentice. As far as I can tell, there’s no way to make the bar smaller, although it naturally appears smaller on mobile devices.
Still, the rest of the page building process is straightforward and comes with lots of customization options. Clicking the ‘+’ in the left sidebar reveals an extensive list of blocks, including regular WordPress blocks, custom blocks from other plugins and a handful of Thrive Integrations.
You can drag and drop these into the lesson area, using the same technology to reorganize them as necessary.
Editing Blocks
You can edit an individual content block by clicking on it, which will open a sidebar on the left side of the page with all of the configuration options for that block. And there are a lot of configuration options for most blocks. Even a simple text block comes with dozens of customization options.
You’ll also note that the basic options, such as alignment, appear in a bar across the top of the page. I found this placement a bit odd, but it’s easy enough to get used to.
Once you’re satisfied with the content of your lesson, open the left sidebar, click on the arrow next to the ‘Save Work’ button, and select ‘Save and Preview’. This gives you an opportunity to view what the page will look like to visitors.
To return to the course editor and build your next lesson, you’ll need to return to your WordPress dashboard, then to Thrive Apprentice.
Put Your Course up for Sale
Unlike other popular course building plugins, Thrive Apprentice doesn’t offer a direct connection to a processor such as PayPal or Stripe. Instead, you’ll need to use an ecommerce tool or membership plugin. For the purposes of this article, I’ll focus on how to set up payment through WooCommerce, since it’s the most popular ecommerce tool for WordPress.
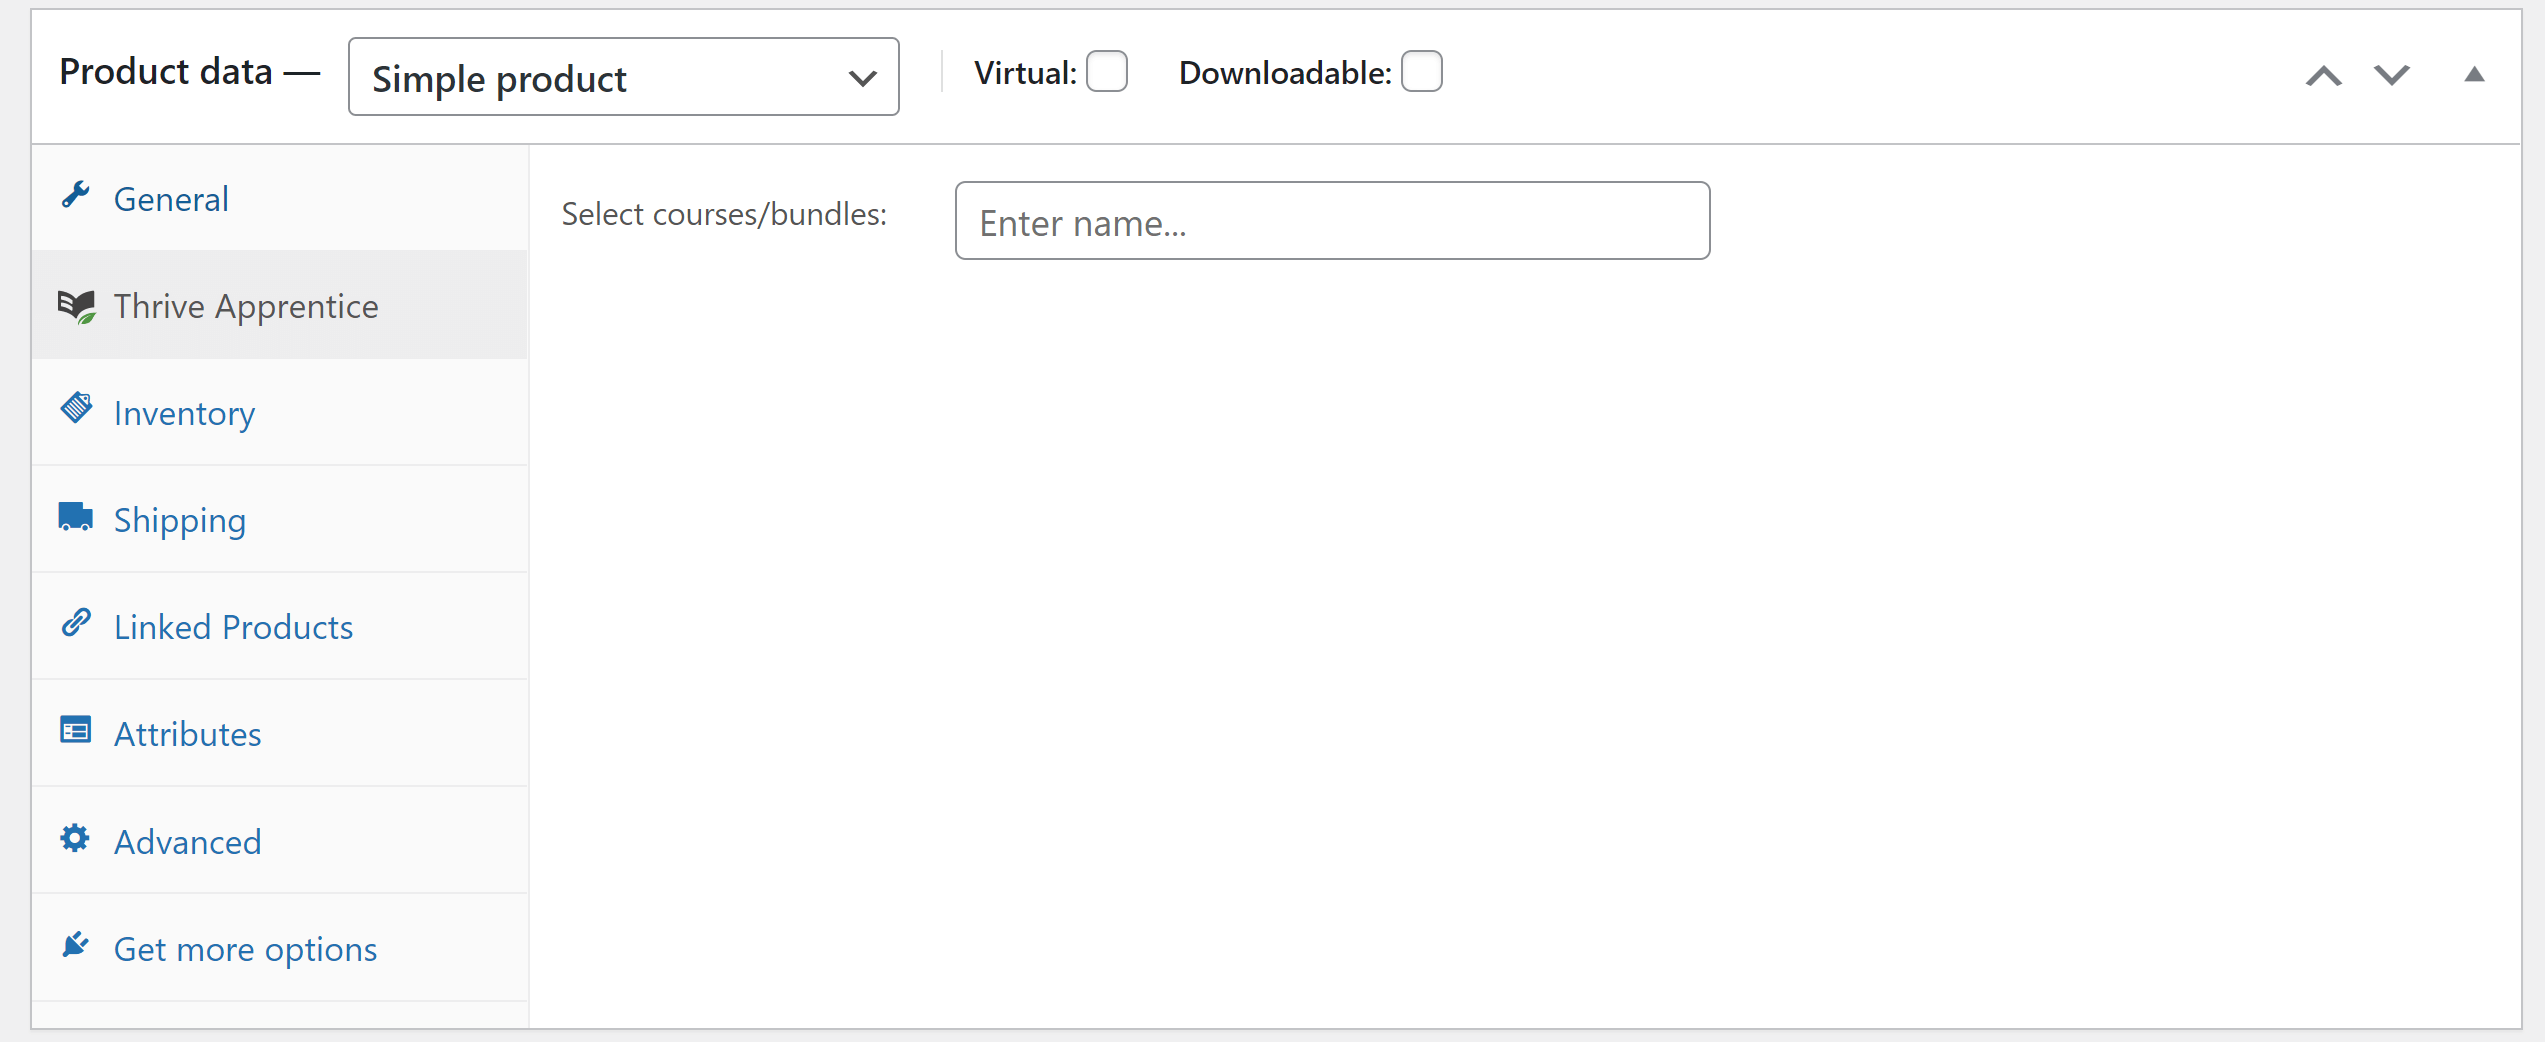
First, head to WooCommerce and scroll down, then click ‘Add Products’.
Enter the title and description of your course on the next page, then scroll down to the ‘Product Data’ area, click on ‘Thrive Apprentice’ and type the name of the course into the box that appears. If you click on the box itself you can also access a dropdown menu that lists all of the courses you’ve created.
How to Add Quizzes to Your Course with Thrive Quiz Builder
Now we’ve covered the basics of course building, let’s take a closer look at how to add quizzes with the Thrive Quiz Builder.
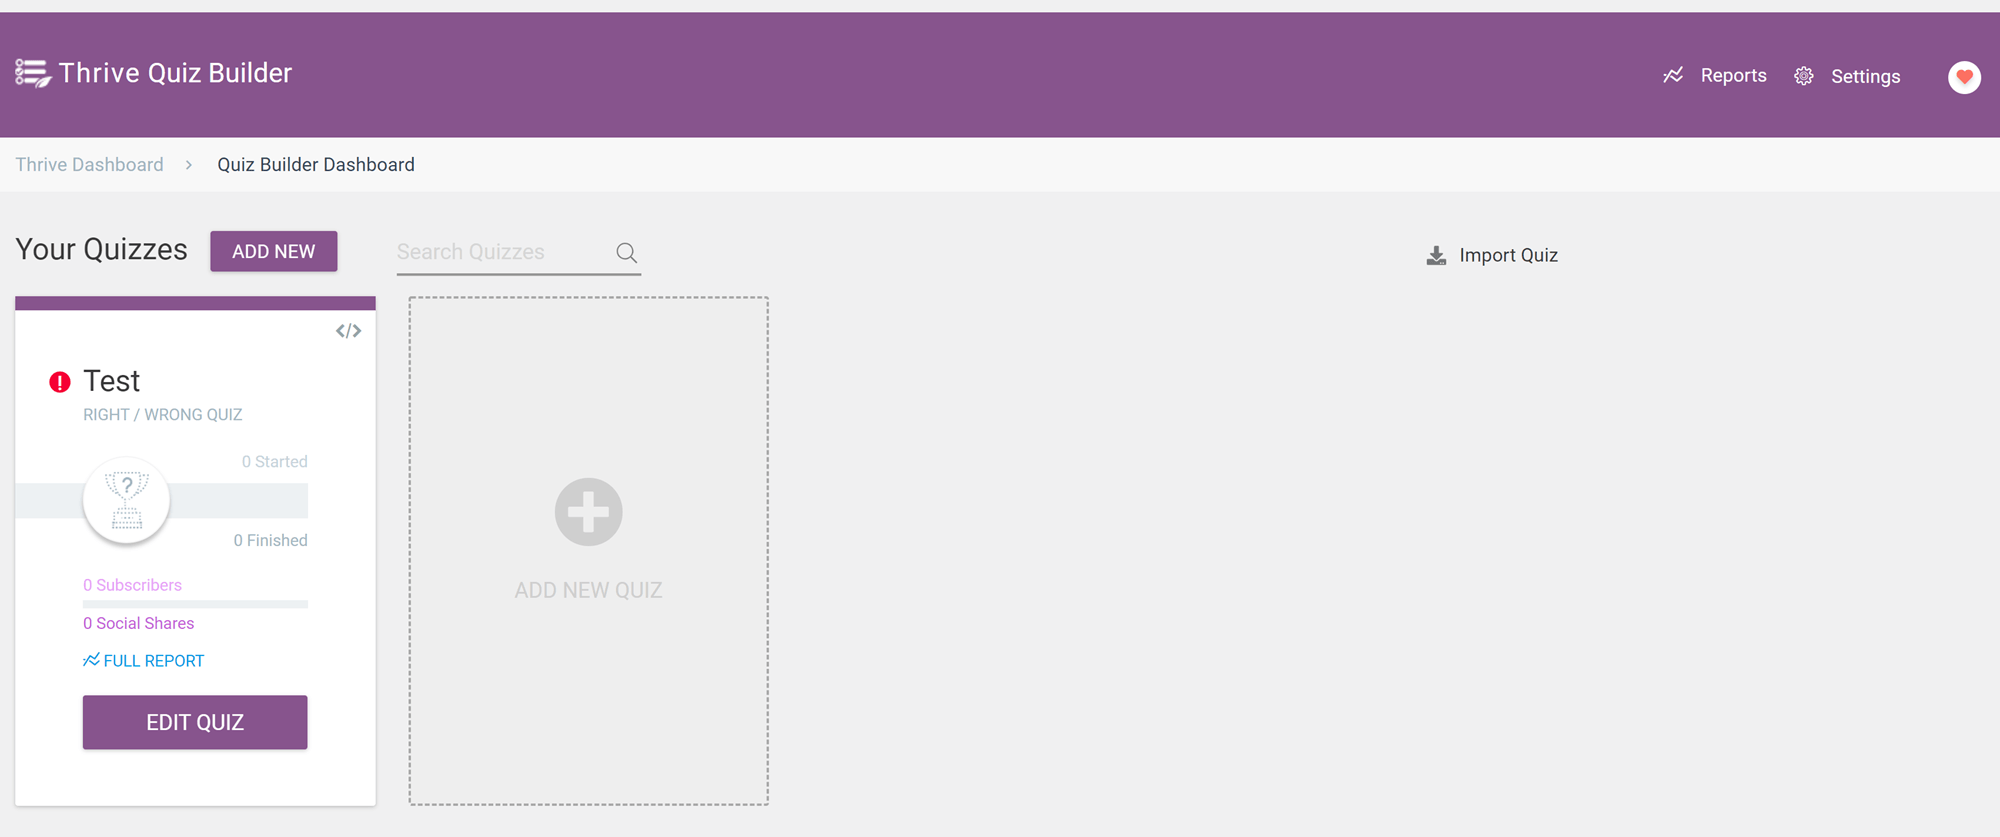
To get started, you’ll need to install the Thrive Quiz Builder through the Product Manager. If you installed this plugin at the same time as Thrive Apprentice, you can access the Quiz Manager through the Product Manager. This will open a page where you can view and create quizzes.

Click ‘Add New Quiz’, then choose the purpose of your quiz from the options provided. Since you’re building a quiz for your course, you’ll probably want to stick with ‘Build from Scratch’.
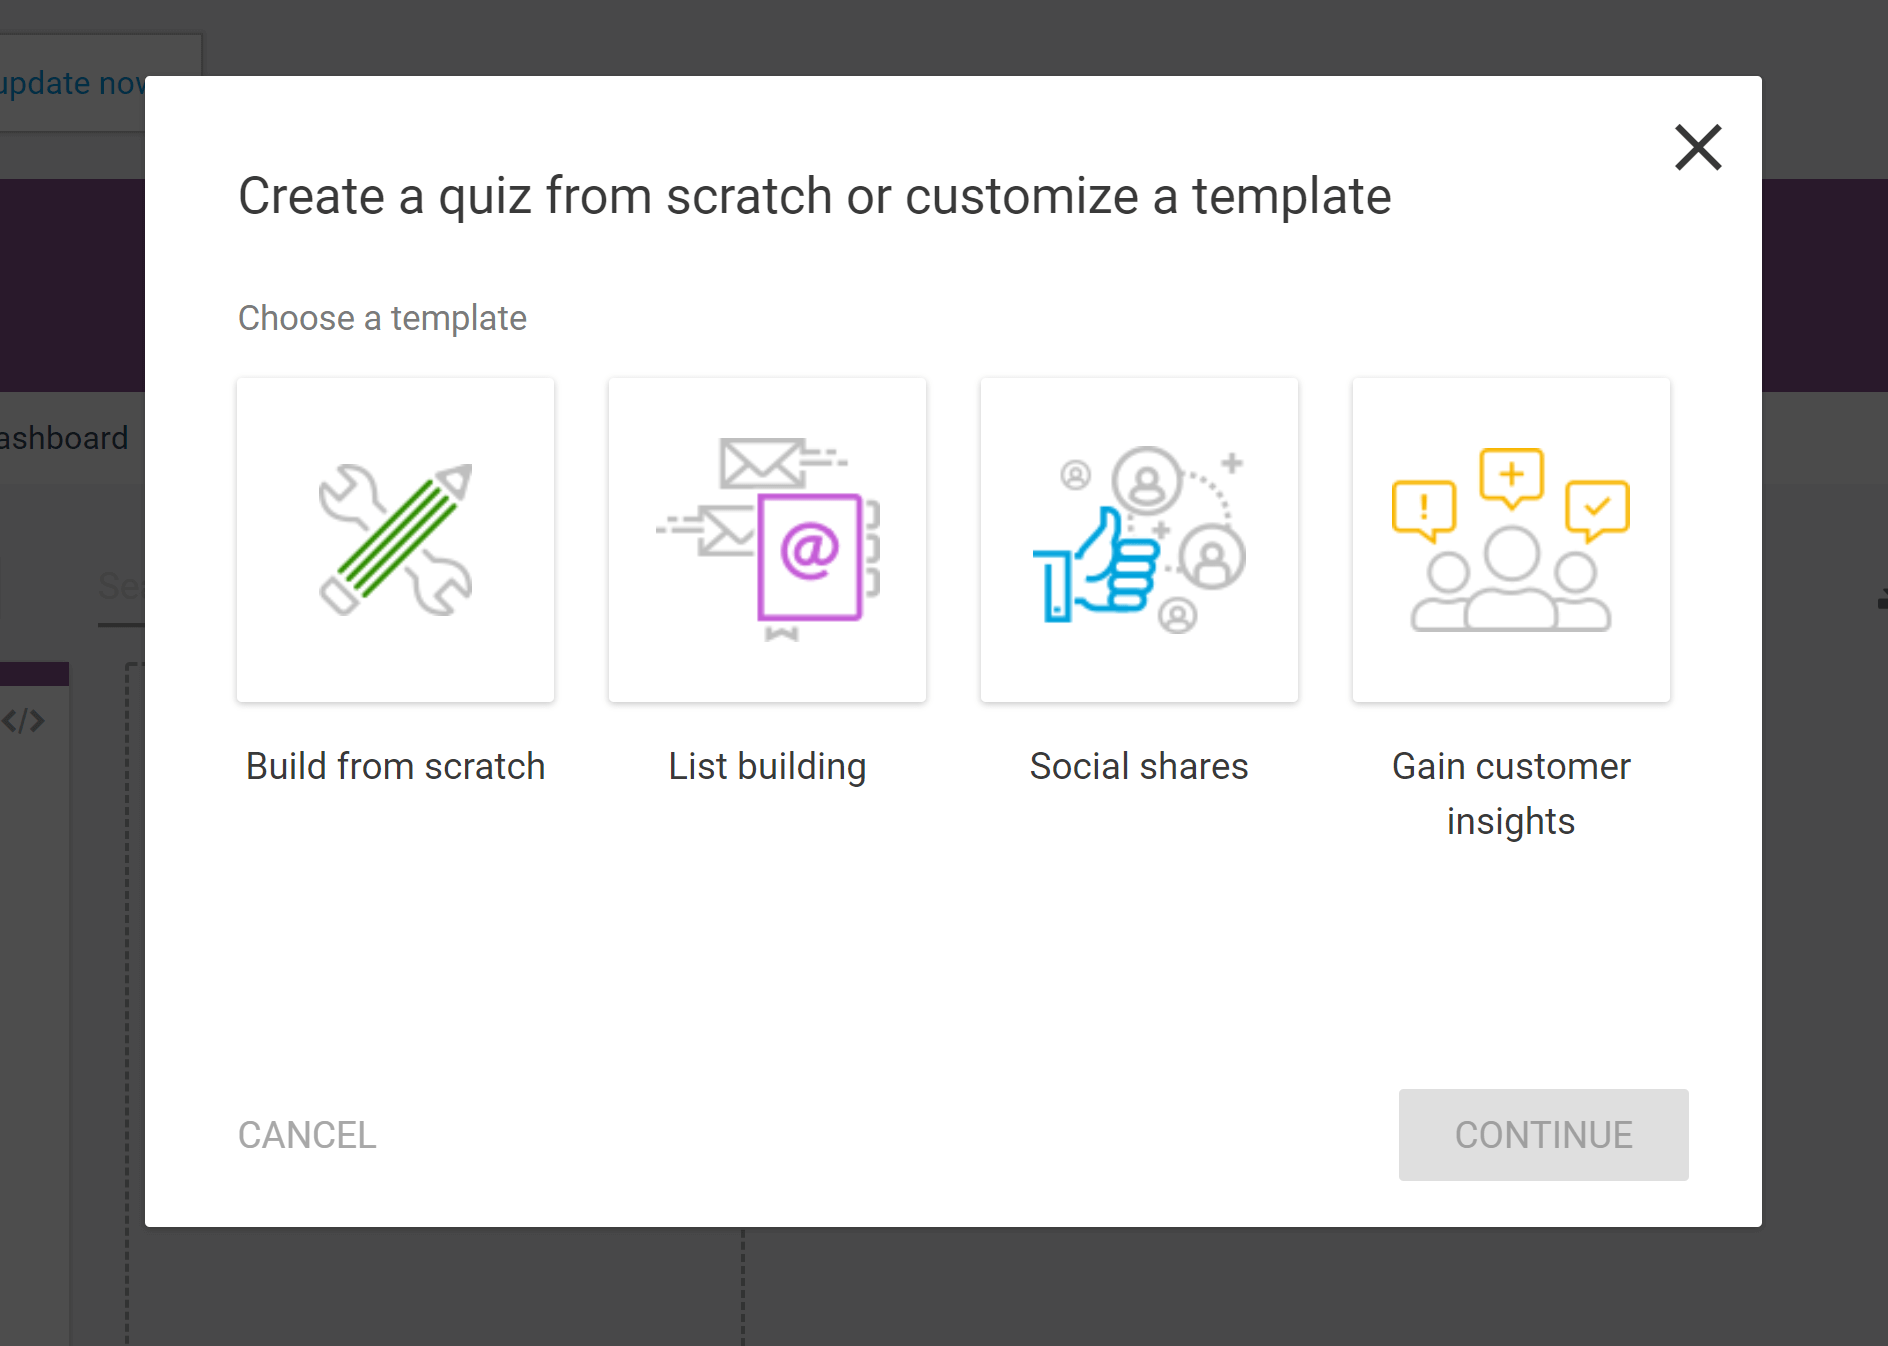
This will open a page where you can configure three aspects of your quiz:
- Quiz type: This determines how students will be evaluated. Options include number and percentage scores, right/wrong and surveys.
- Quiz style: This is the visual template your quiz will use. The Thrive Quiz Builder offers a wide variety of quiz layouts.
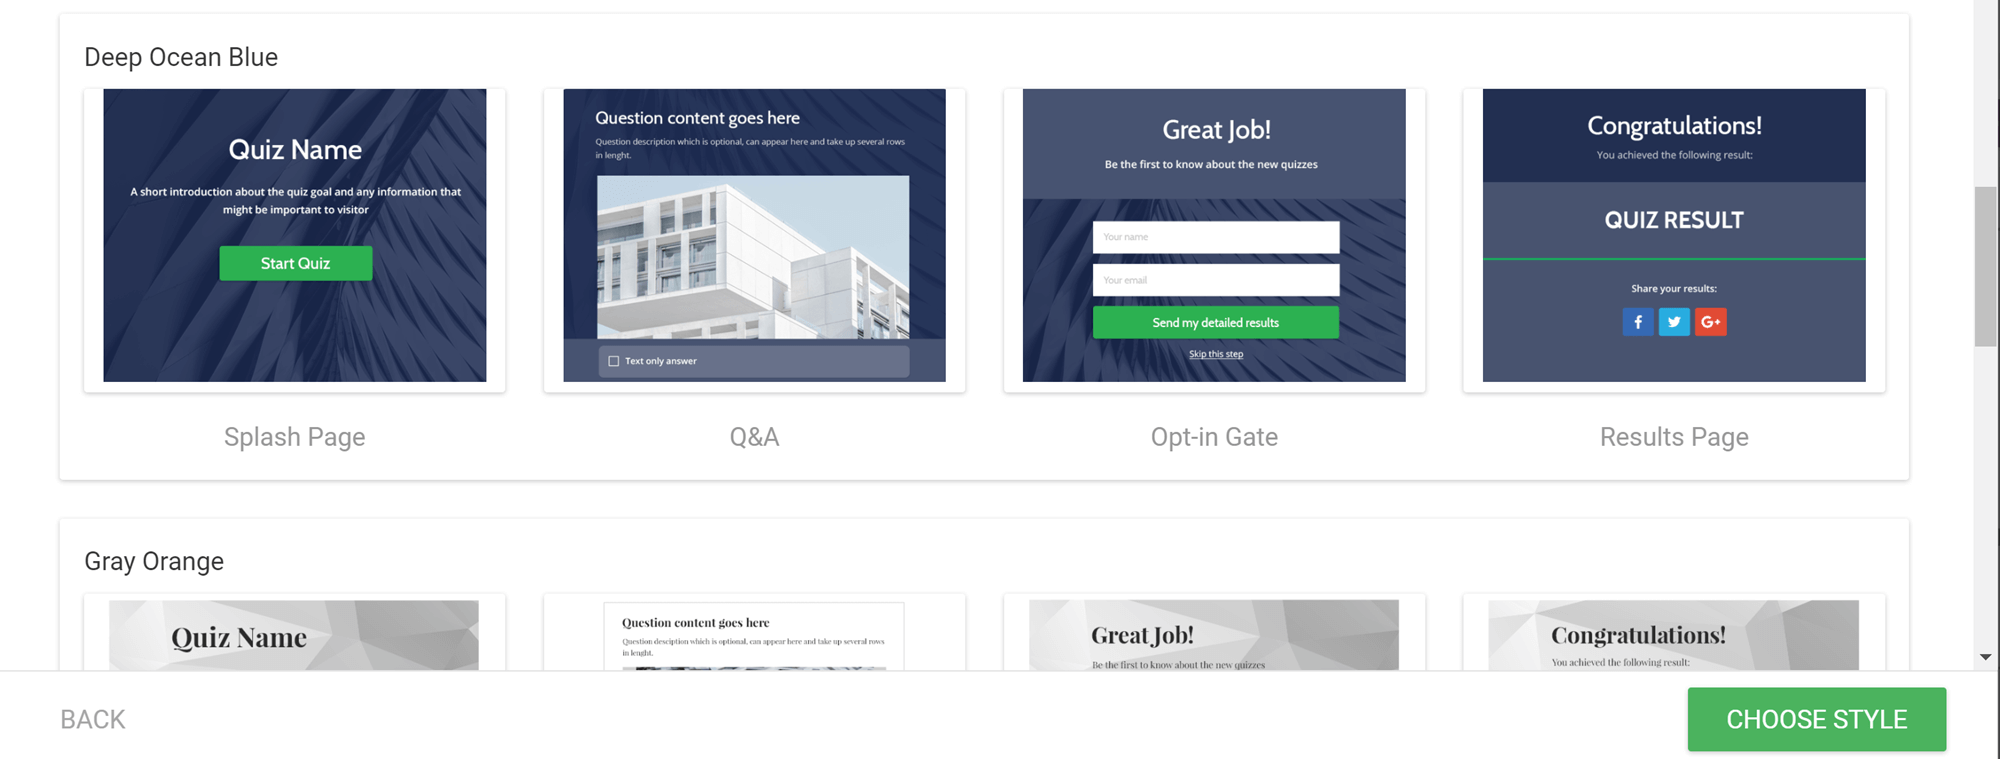
- Social share badge: This allows you to create a customized social media graphic for your quiz, which is great for standalone quizzes, but can be ignored if you’re going to embed your quiz into a course.
Once you’ve chosen your quiz type, the quiz builder will load a module with more options for building your quiz. Click the ‘Manage’ button in the ‘Questions’ box to open the quiz builder.
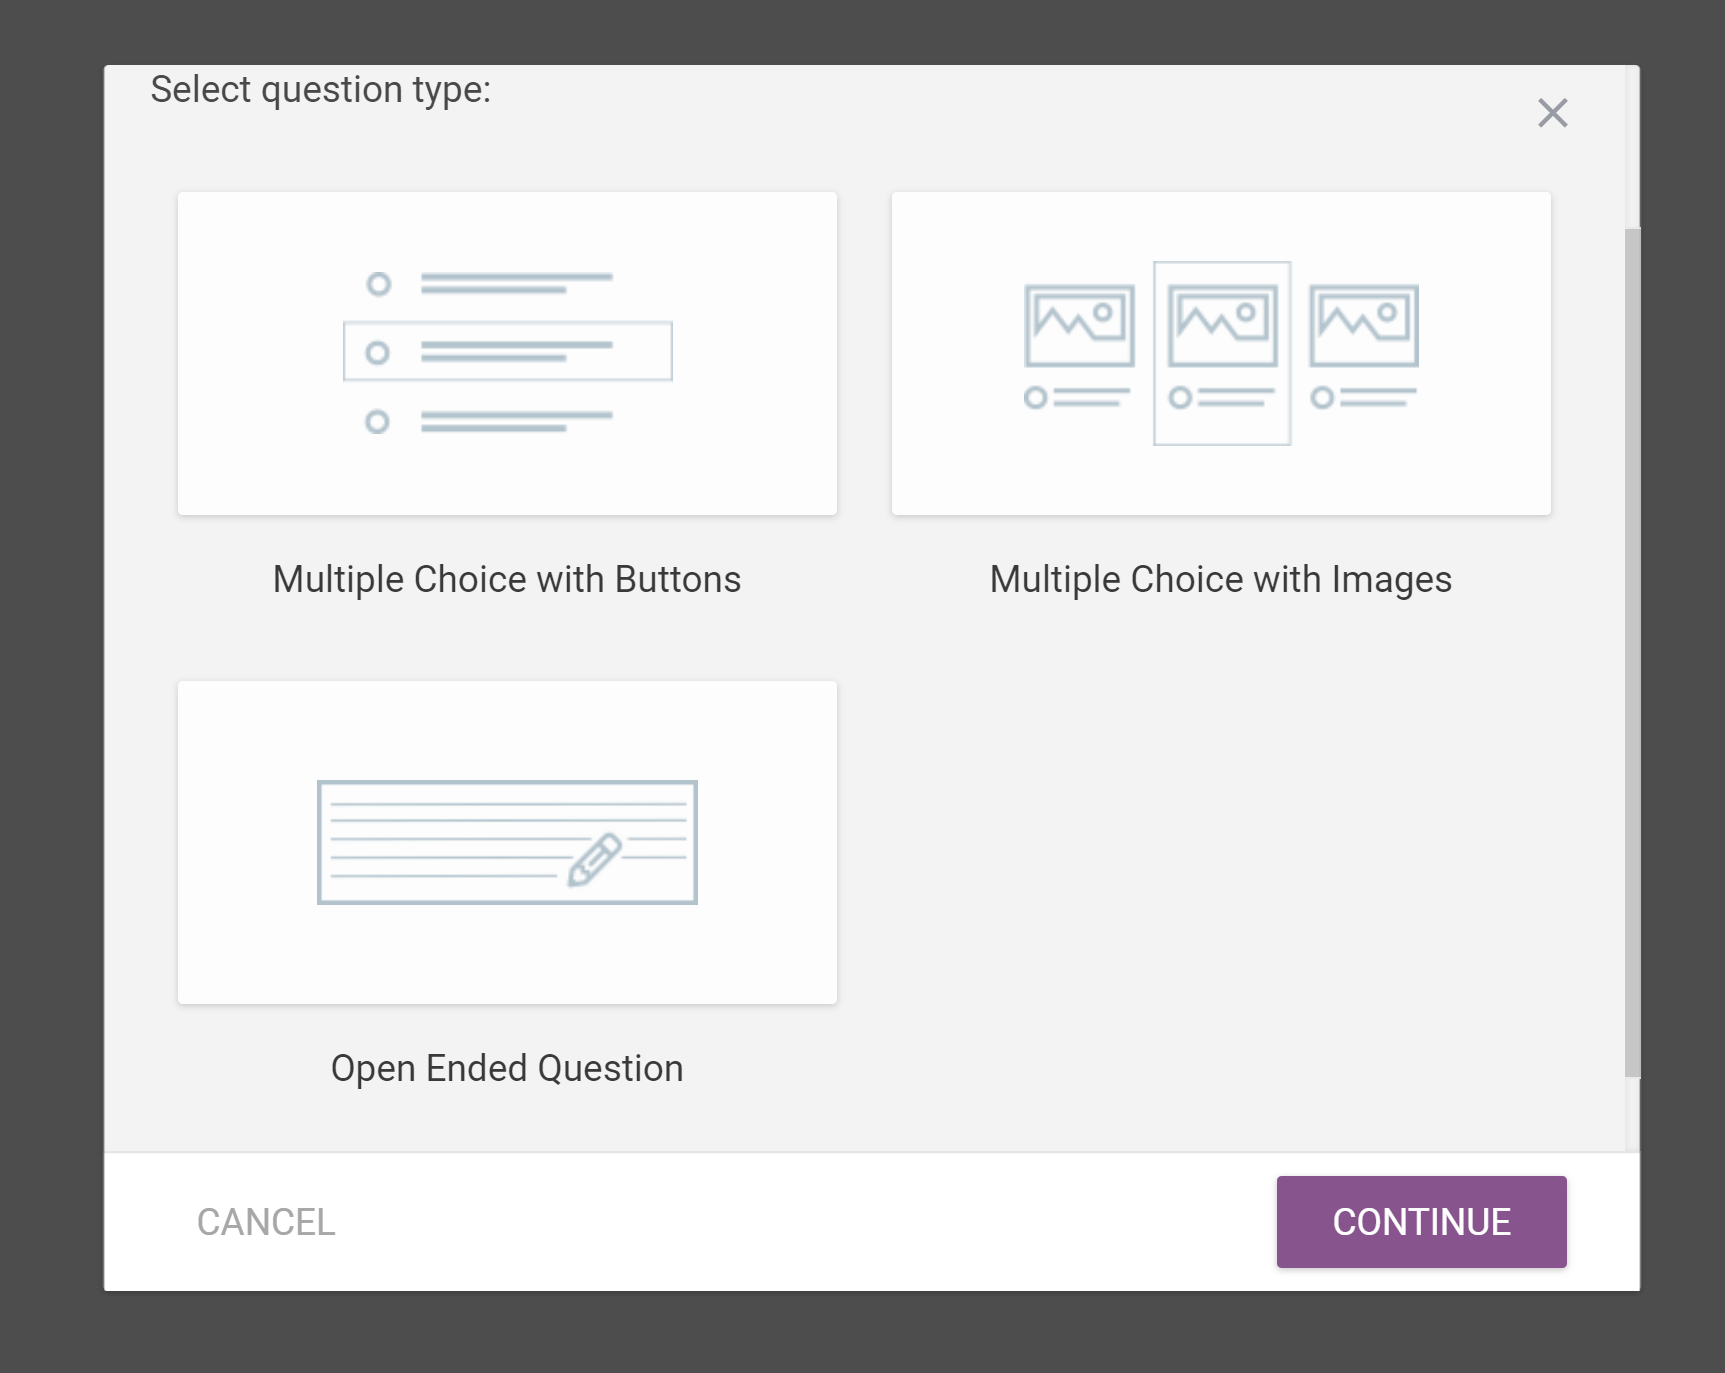
Next, click ‘Add Question’ in the top left corner. This will open a box where you can choose the type of question you want to create. Thrive Apprentice lets you create multiple choice and open-ended questions.
You’ll then be able to configure the question, possible answers and the correct answer.
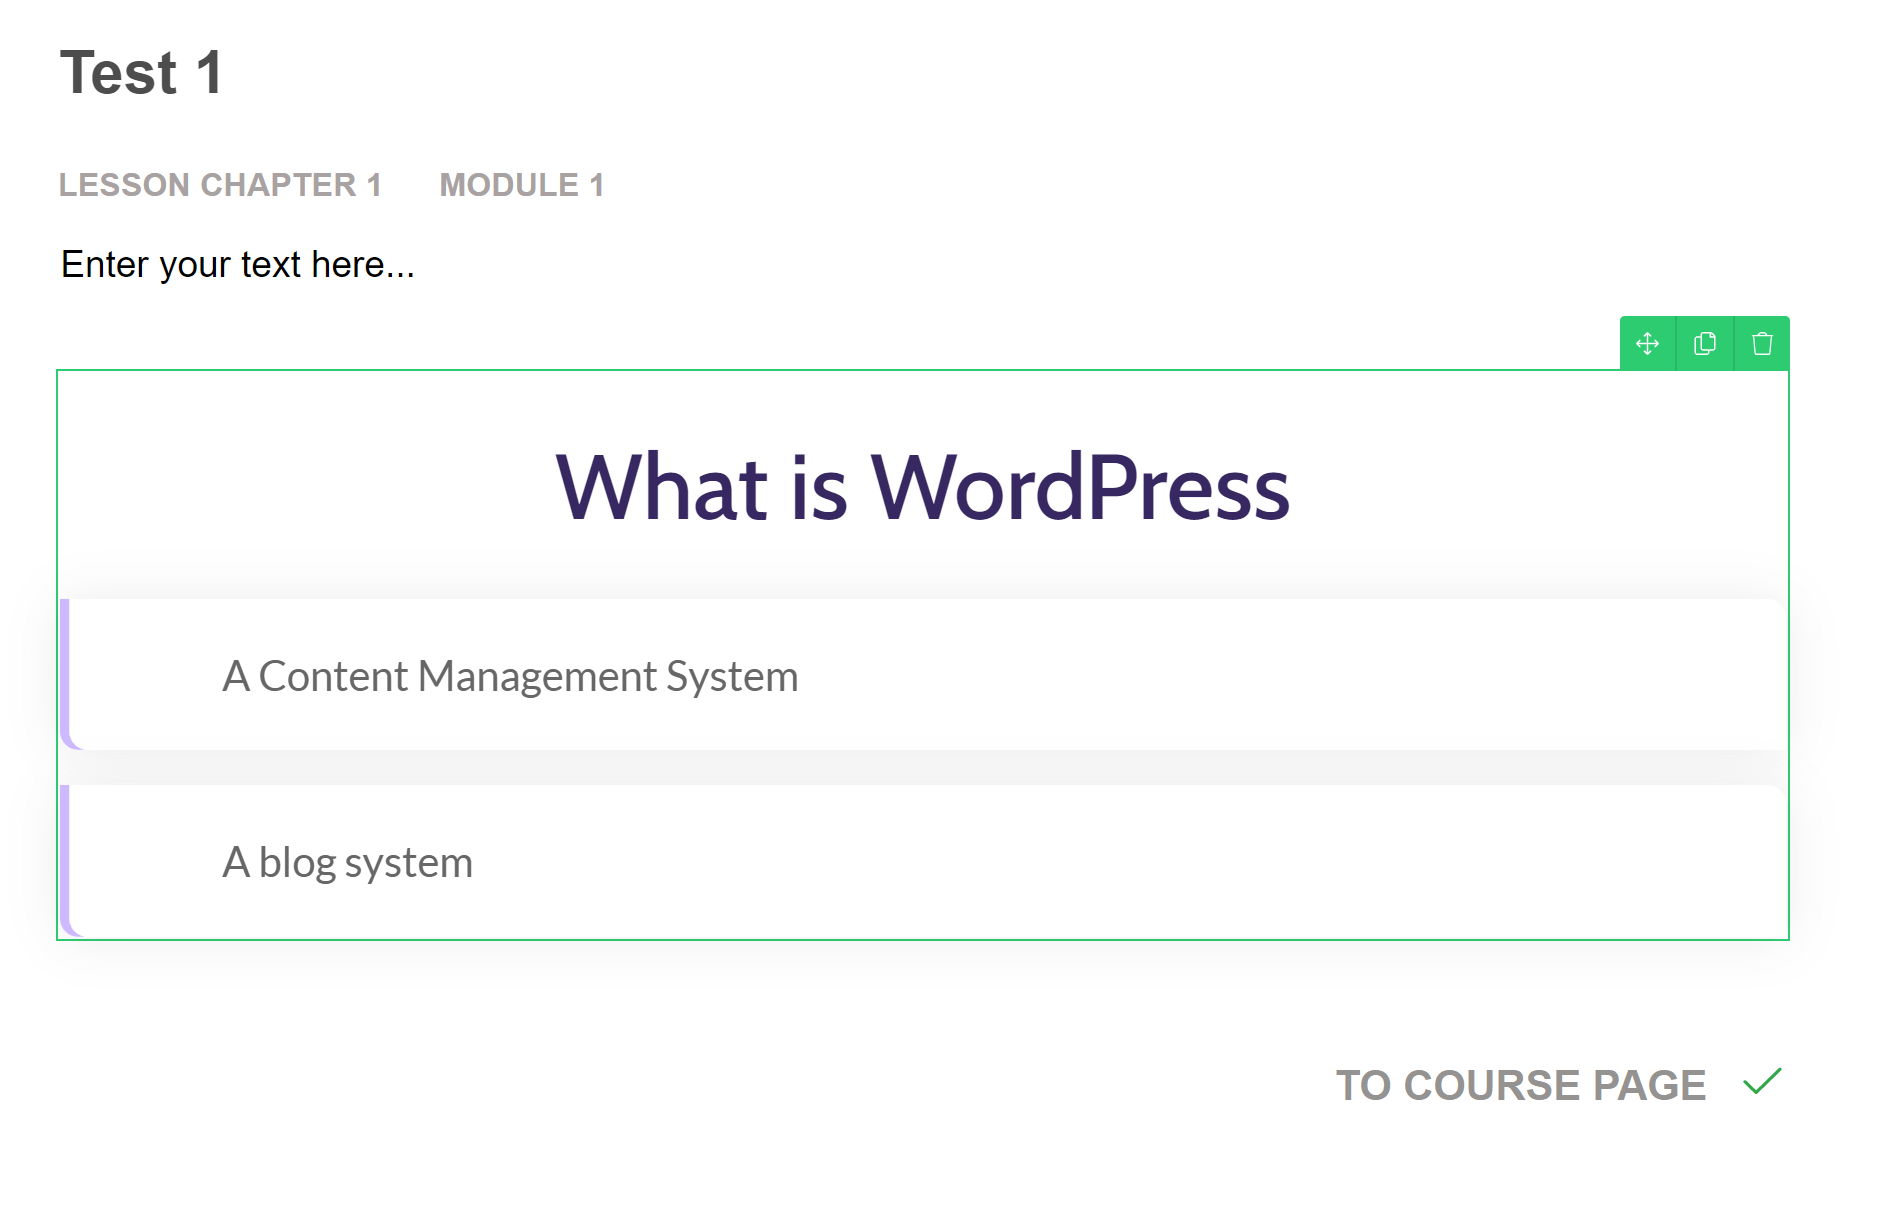
As you add questions, they’ll be displayed in an outline format similar to your course outline:
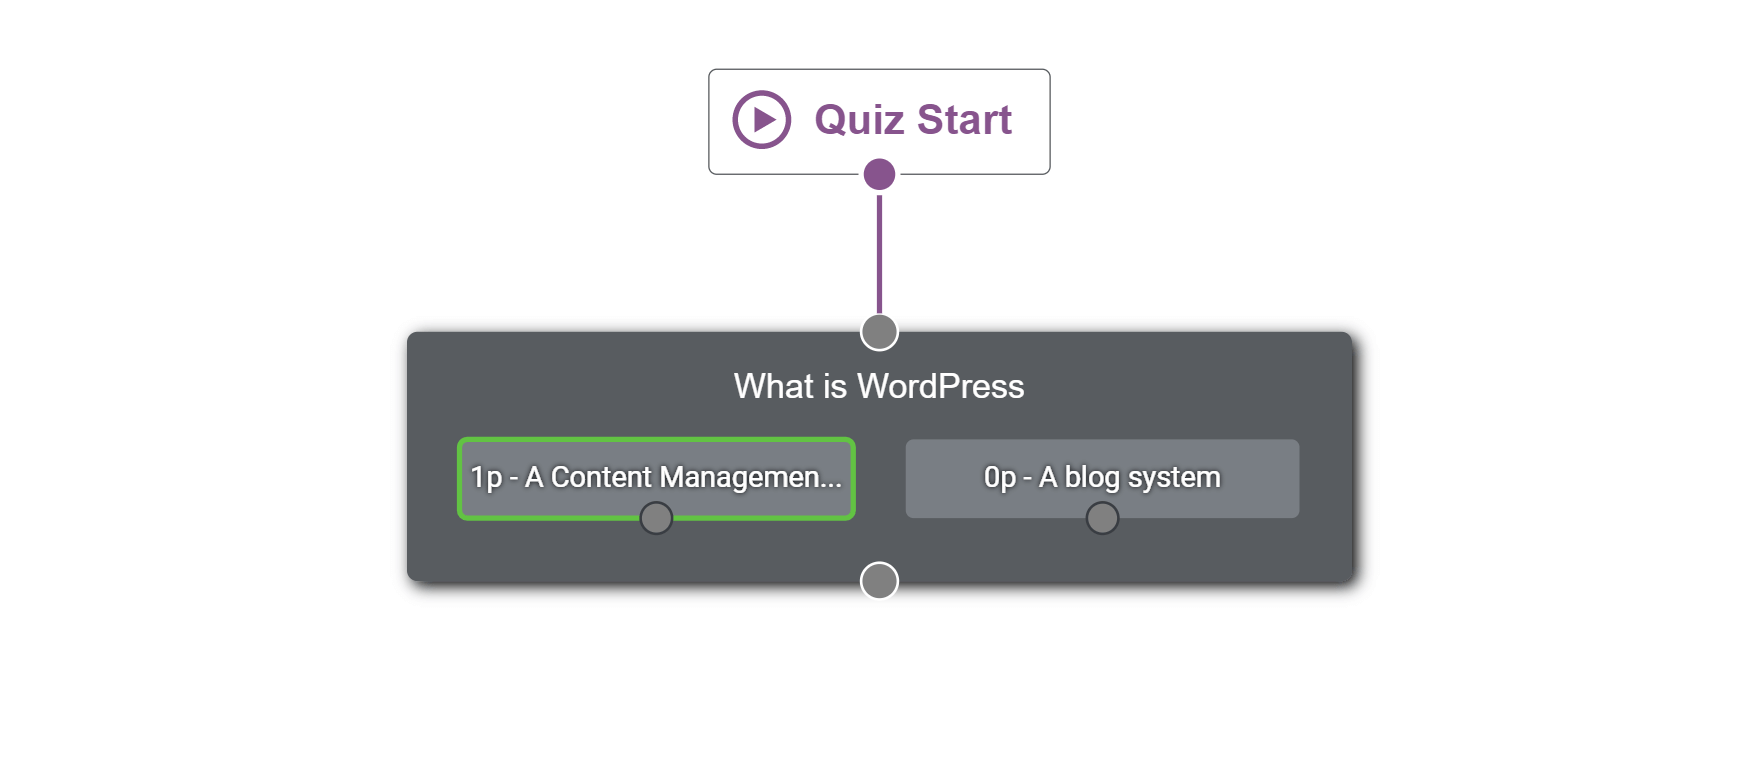
This makes it easy to view the quiz at a glance. You can also use drag-and-drop technology to change the order of the questions at any time.
Once you’ve finished adding questions, you can return to the quiz builder and click the ‘Manage’ button in the ‘Results’ box, which will open Thrive Architect to the results page template. This template is quite attractive already, but it’s also fully customizable.
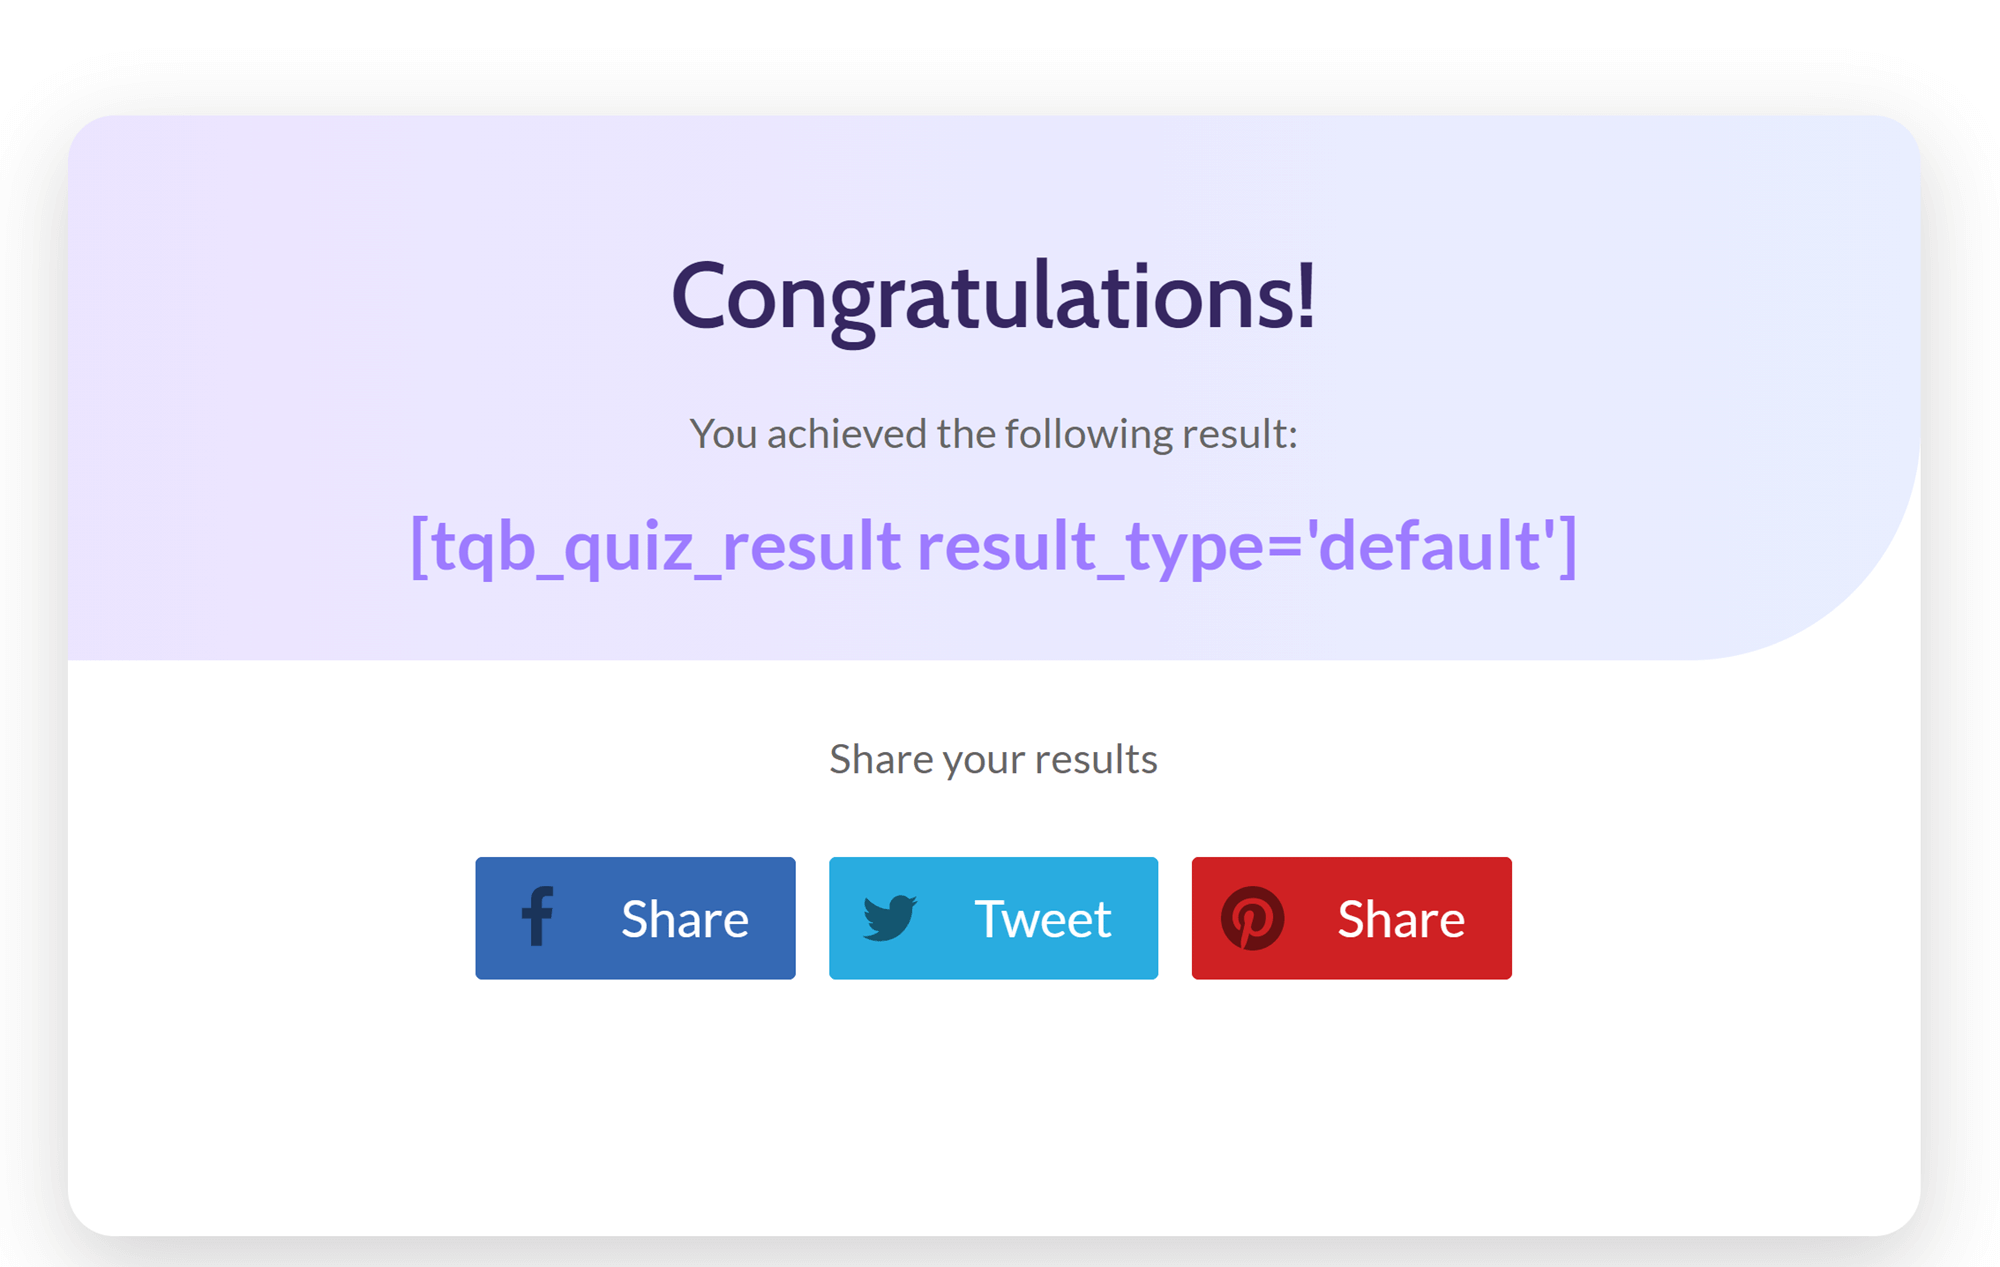
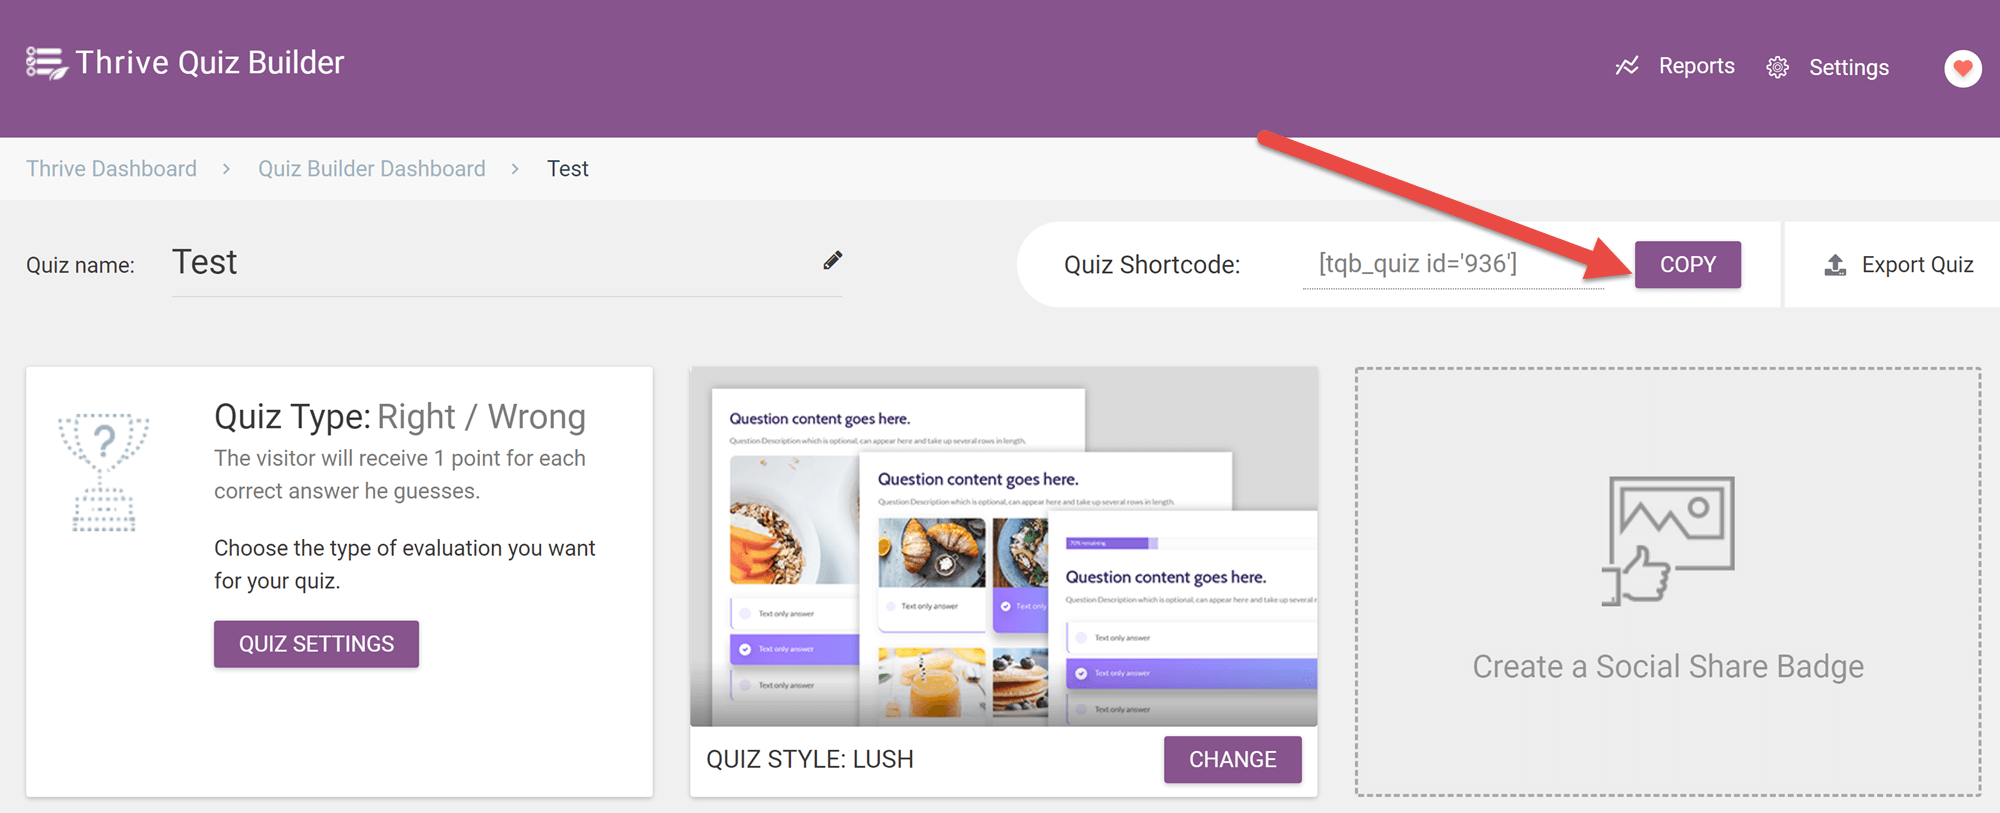
When you’re satisfied with the quiz content, it’s time to add the quiz to your course! To do this, you’ll want to go back to the main configuration page for this quiz and find the shortcode box. Click the ‘Copy’ button next to the shortcode to stick it to your clipboard.
Next, open your course in Thrive Apprentice and add a lesson to your course in the usual way, then open the lesson in Thrive Architect. Open the blocks menu and scroll down until you reach the Thrive Integrations area, then click ‘Quiz’.
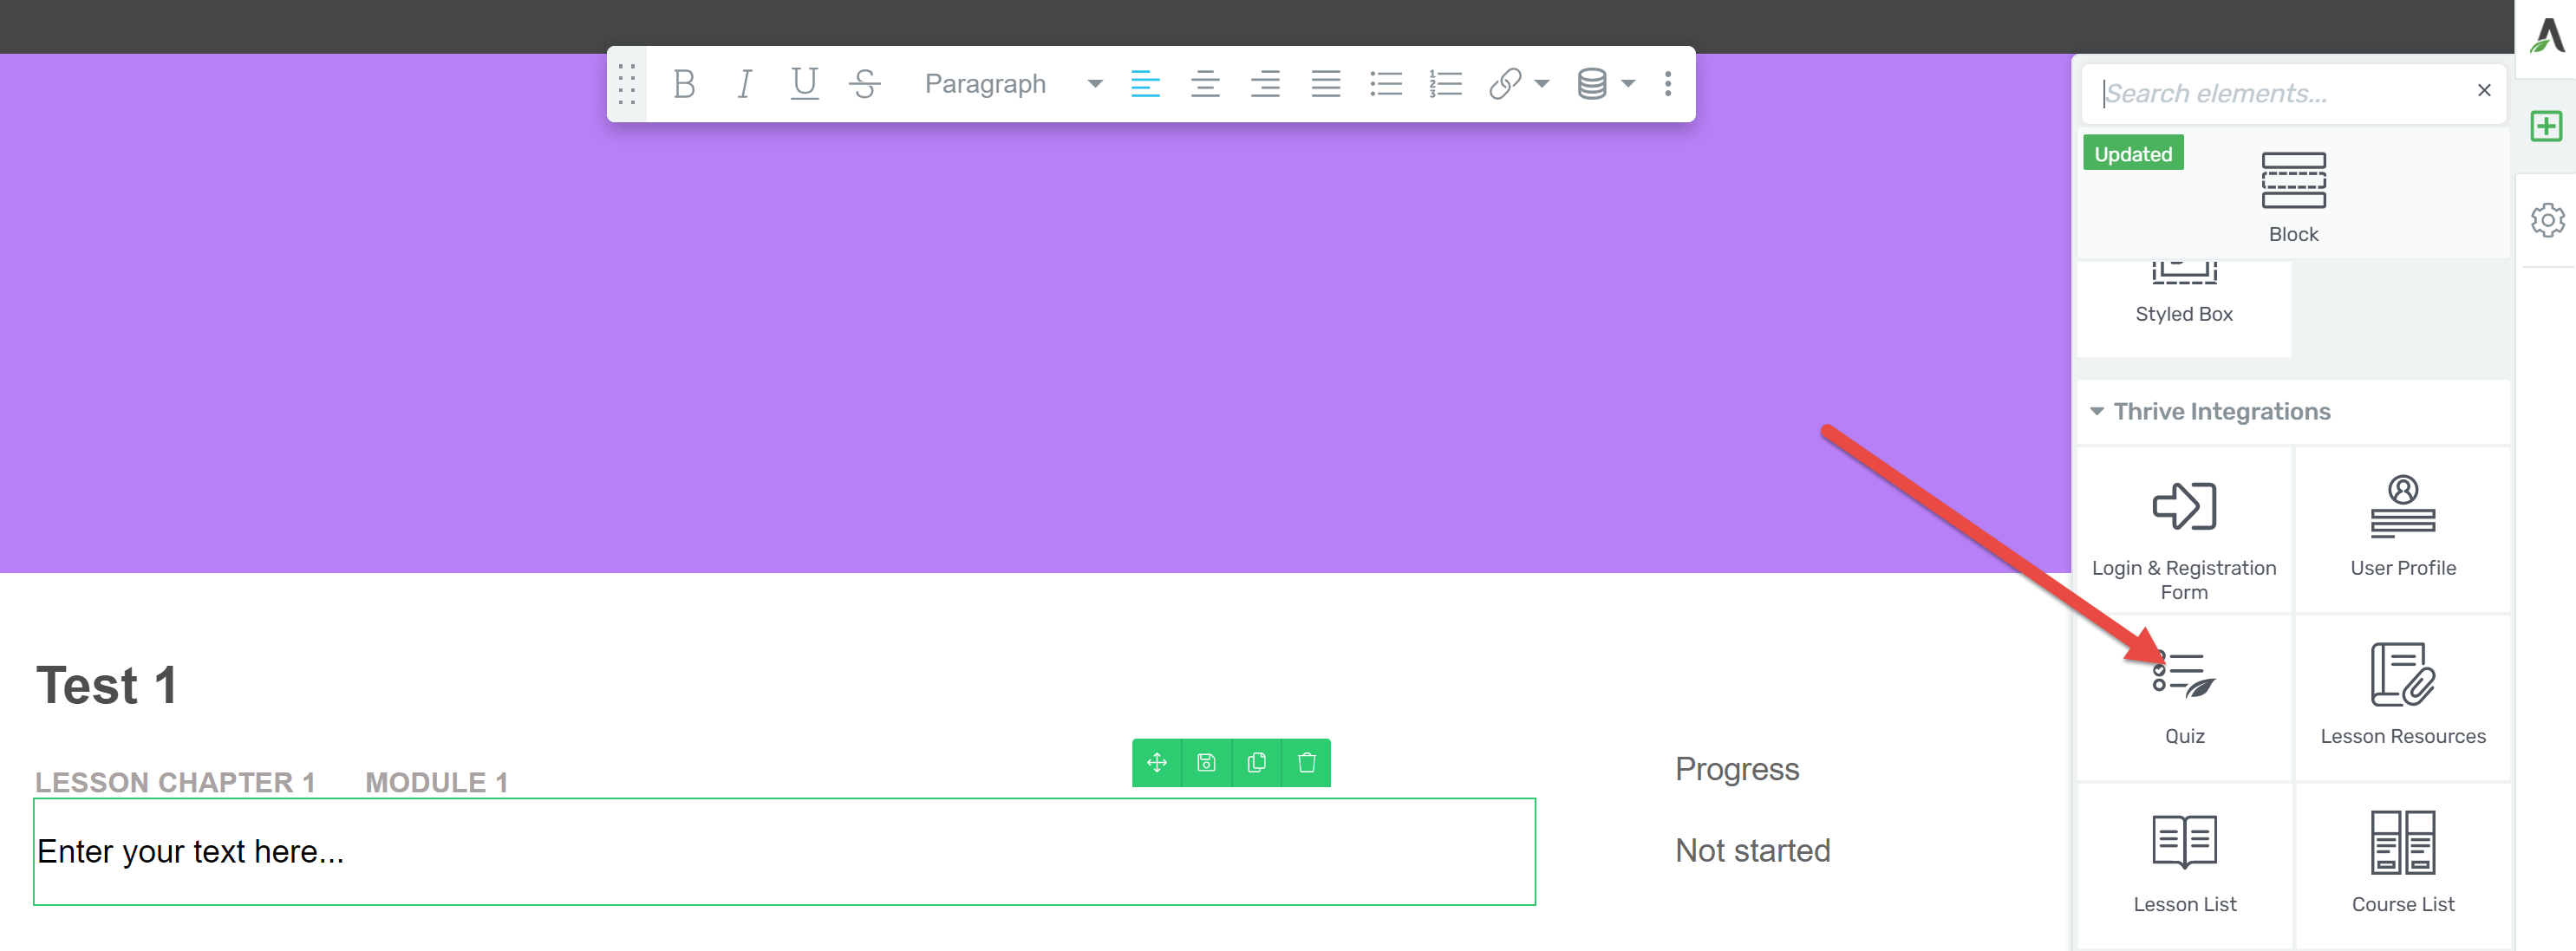
This will open a block with a dropdown menu listing all of your existing quizzes. You’ll note that there are no options for customizing the quiz display; this can only be configured in the Quiz Builder itself.
Final Thoughts
Thrive Apprentice is a powerful yet simple course building plugin with full multimedia compatibility. Access to Thrive Architect Light allows for more customization options than the regular WordPress Editor, without the complications of learning a fully new system. Creating quizzes in a different plugin is a minor hassle, but the options available make it worthwhile. All in all, it’s a pleasant course building experience.
Used/using Thrive Apprentice? Thoughts and experiences?
Discover more from WPChestnuts
Subscribe to get the latest posts sent to your email.